How do I use Magic Erase tool?
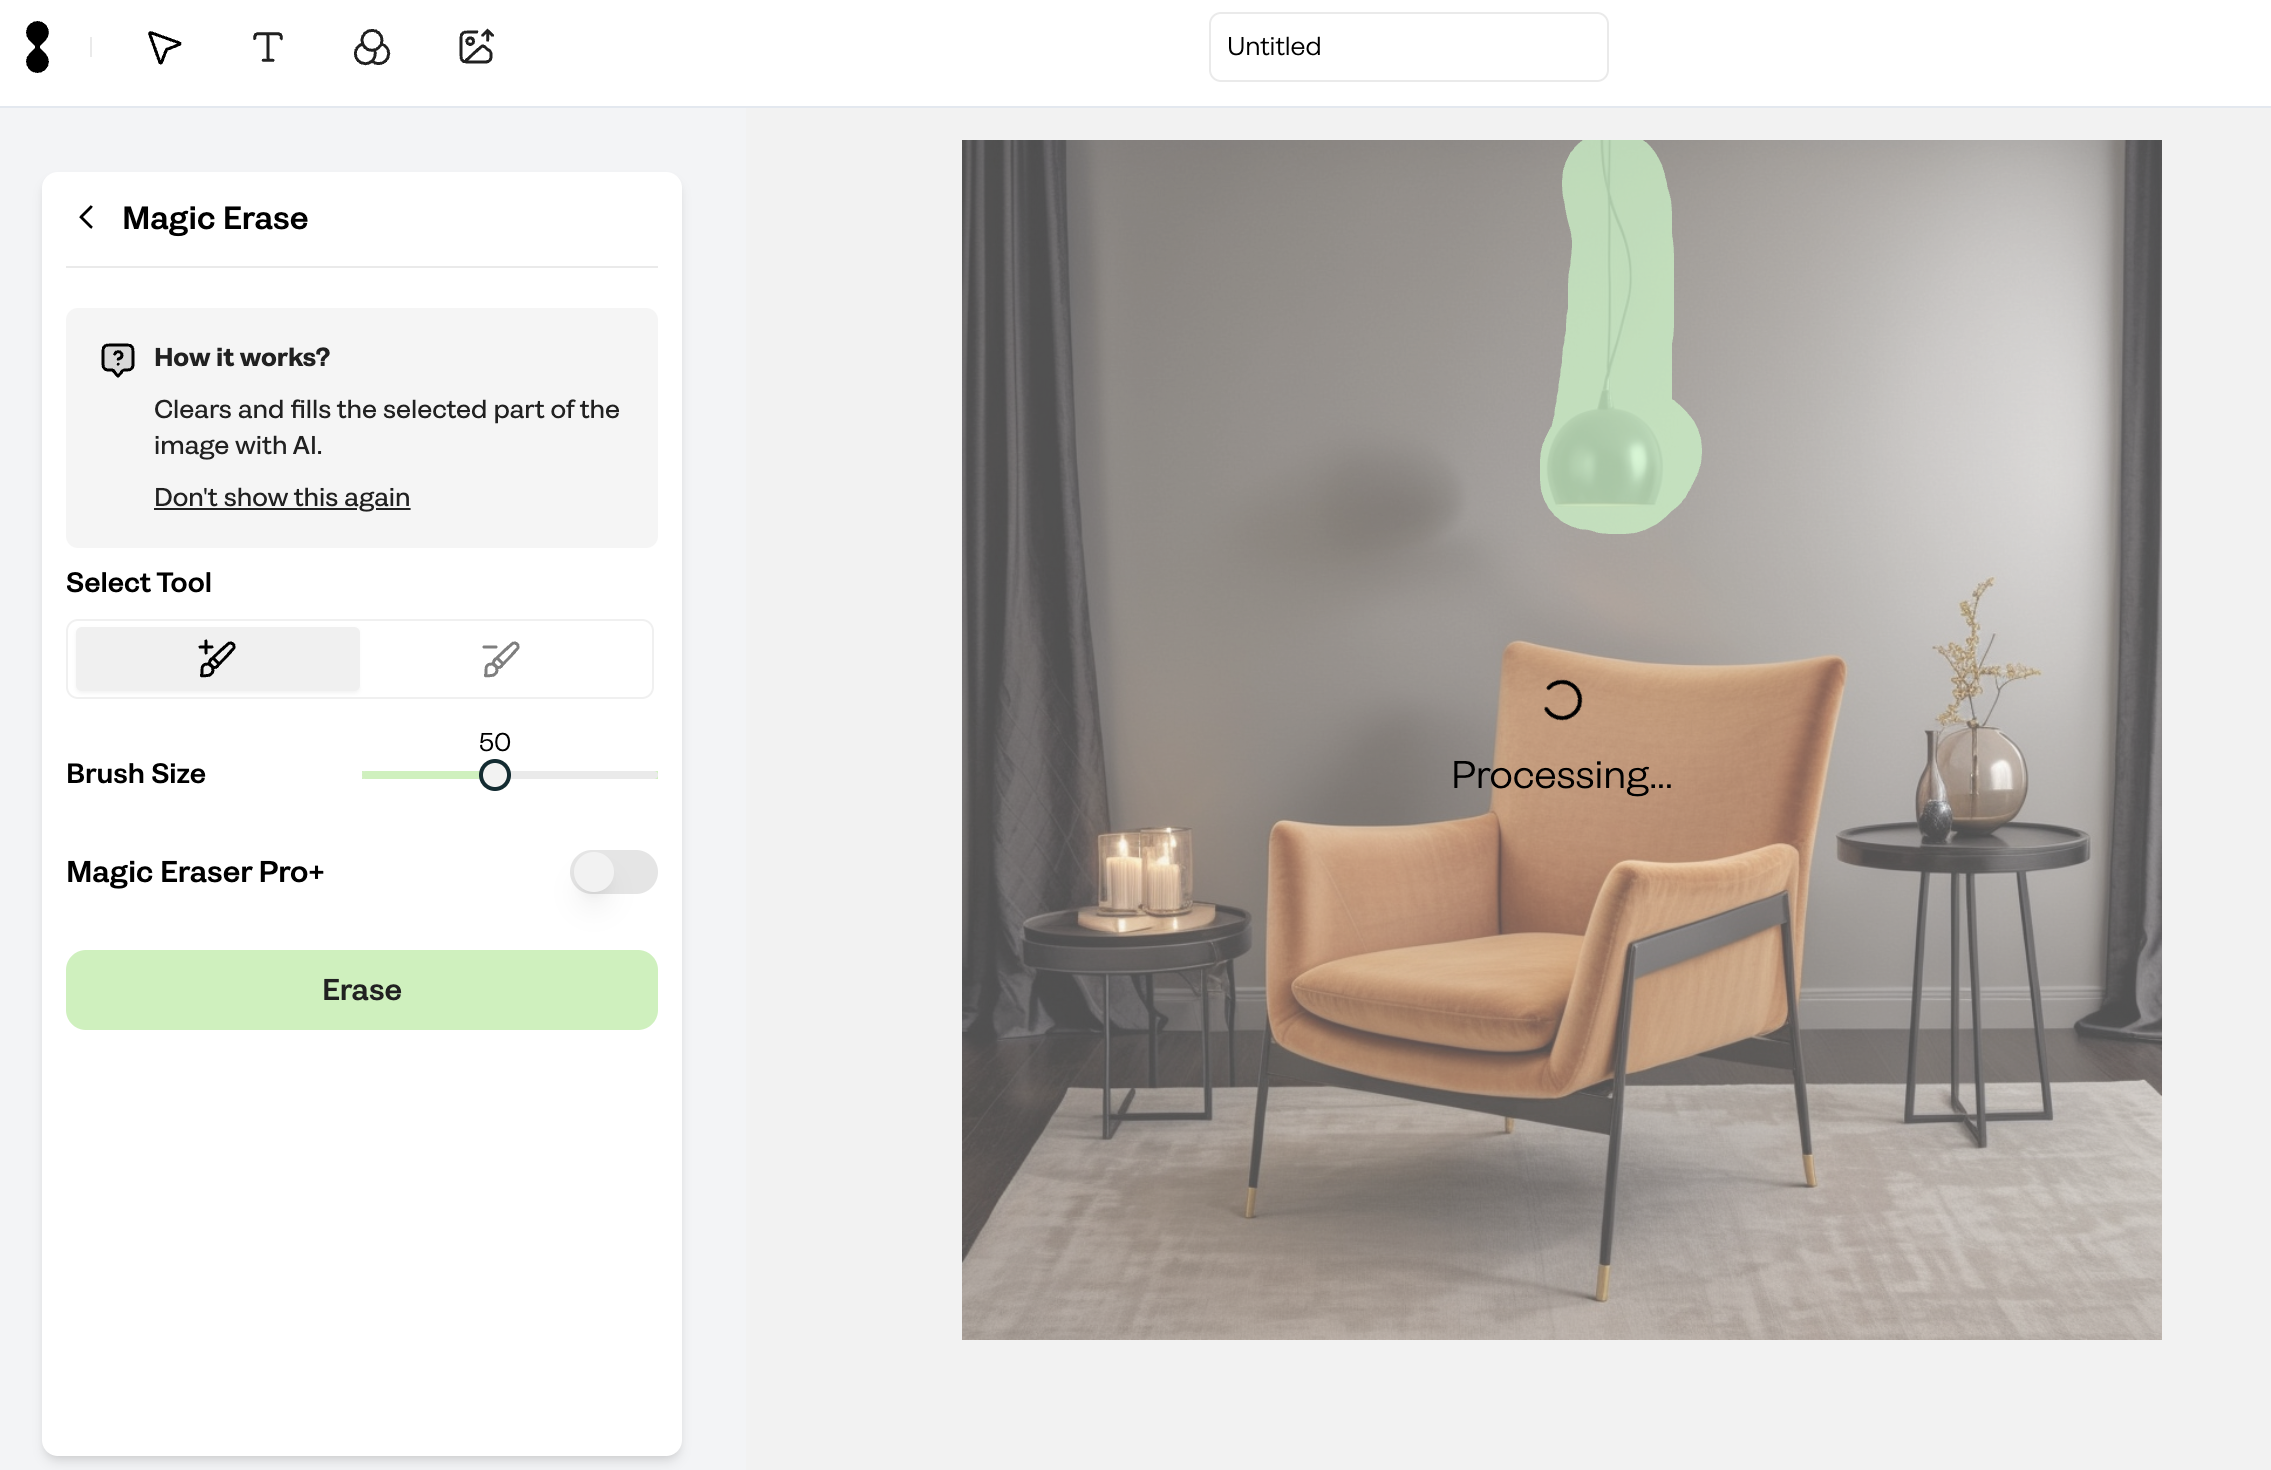
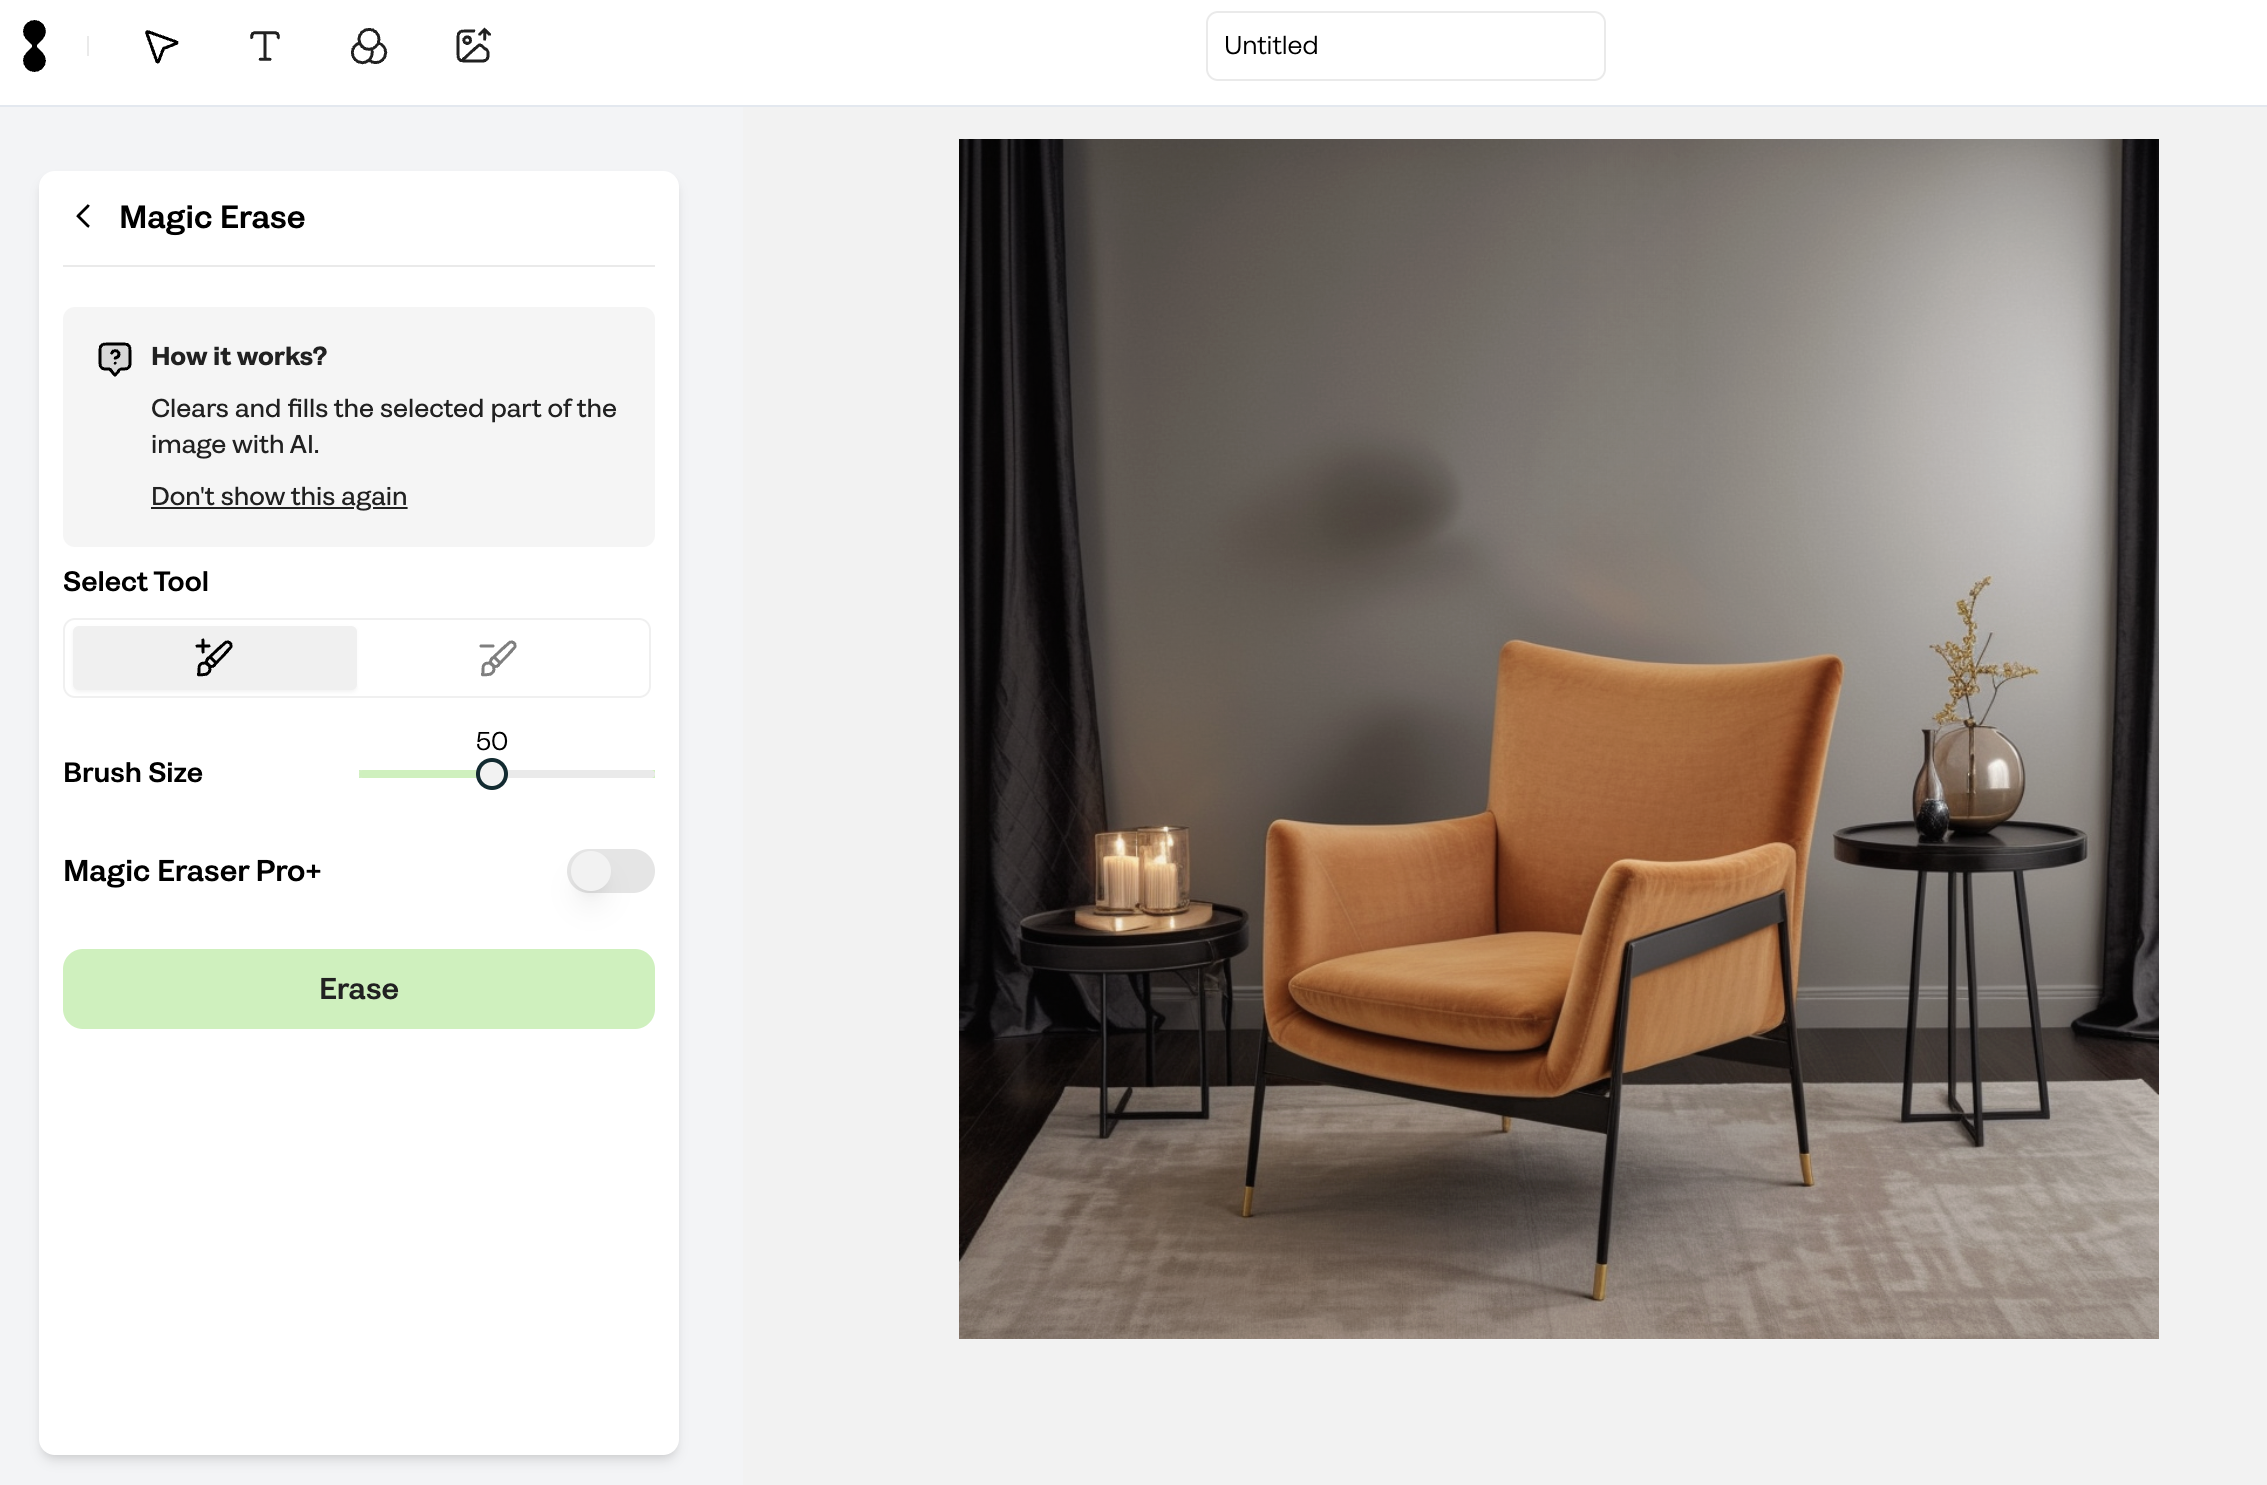
"Magic Erase" tool is to erase a part of the image that you do not like with AI by simply sketching. To use "Magic Erase" tool, follow these steps:
1. Once your creation is completed, review your results images on the "Result"
page or in your "Projects" section on the Creative Suite tab.
2. See the "AI Edit" tools on the left menu and select the "Magic Erase"
3. Use the brush tool and sketch the area you want to erase. You can adjust brush size.
4. Click the "Erase" and apply your image. The AI will process and make the necessary adjustments.
5. Check the edited image. If satisfied, "Save" or "Download" it. If not, you can revert and try again.
You can activate "Magic Eraser Pro" feature for "Professional Package" and upper.
Visit https://www.crait.it/pricing for details.
This feature provides better image quality while erasing a part of the image.


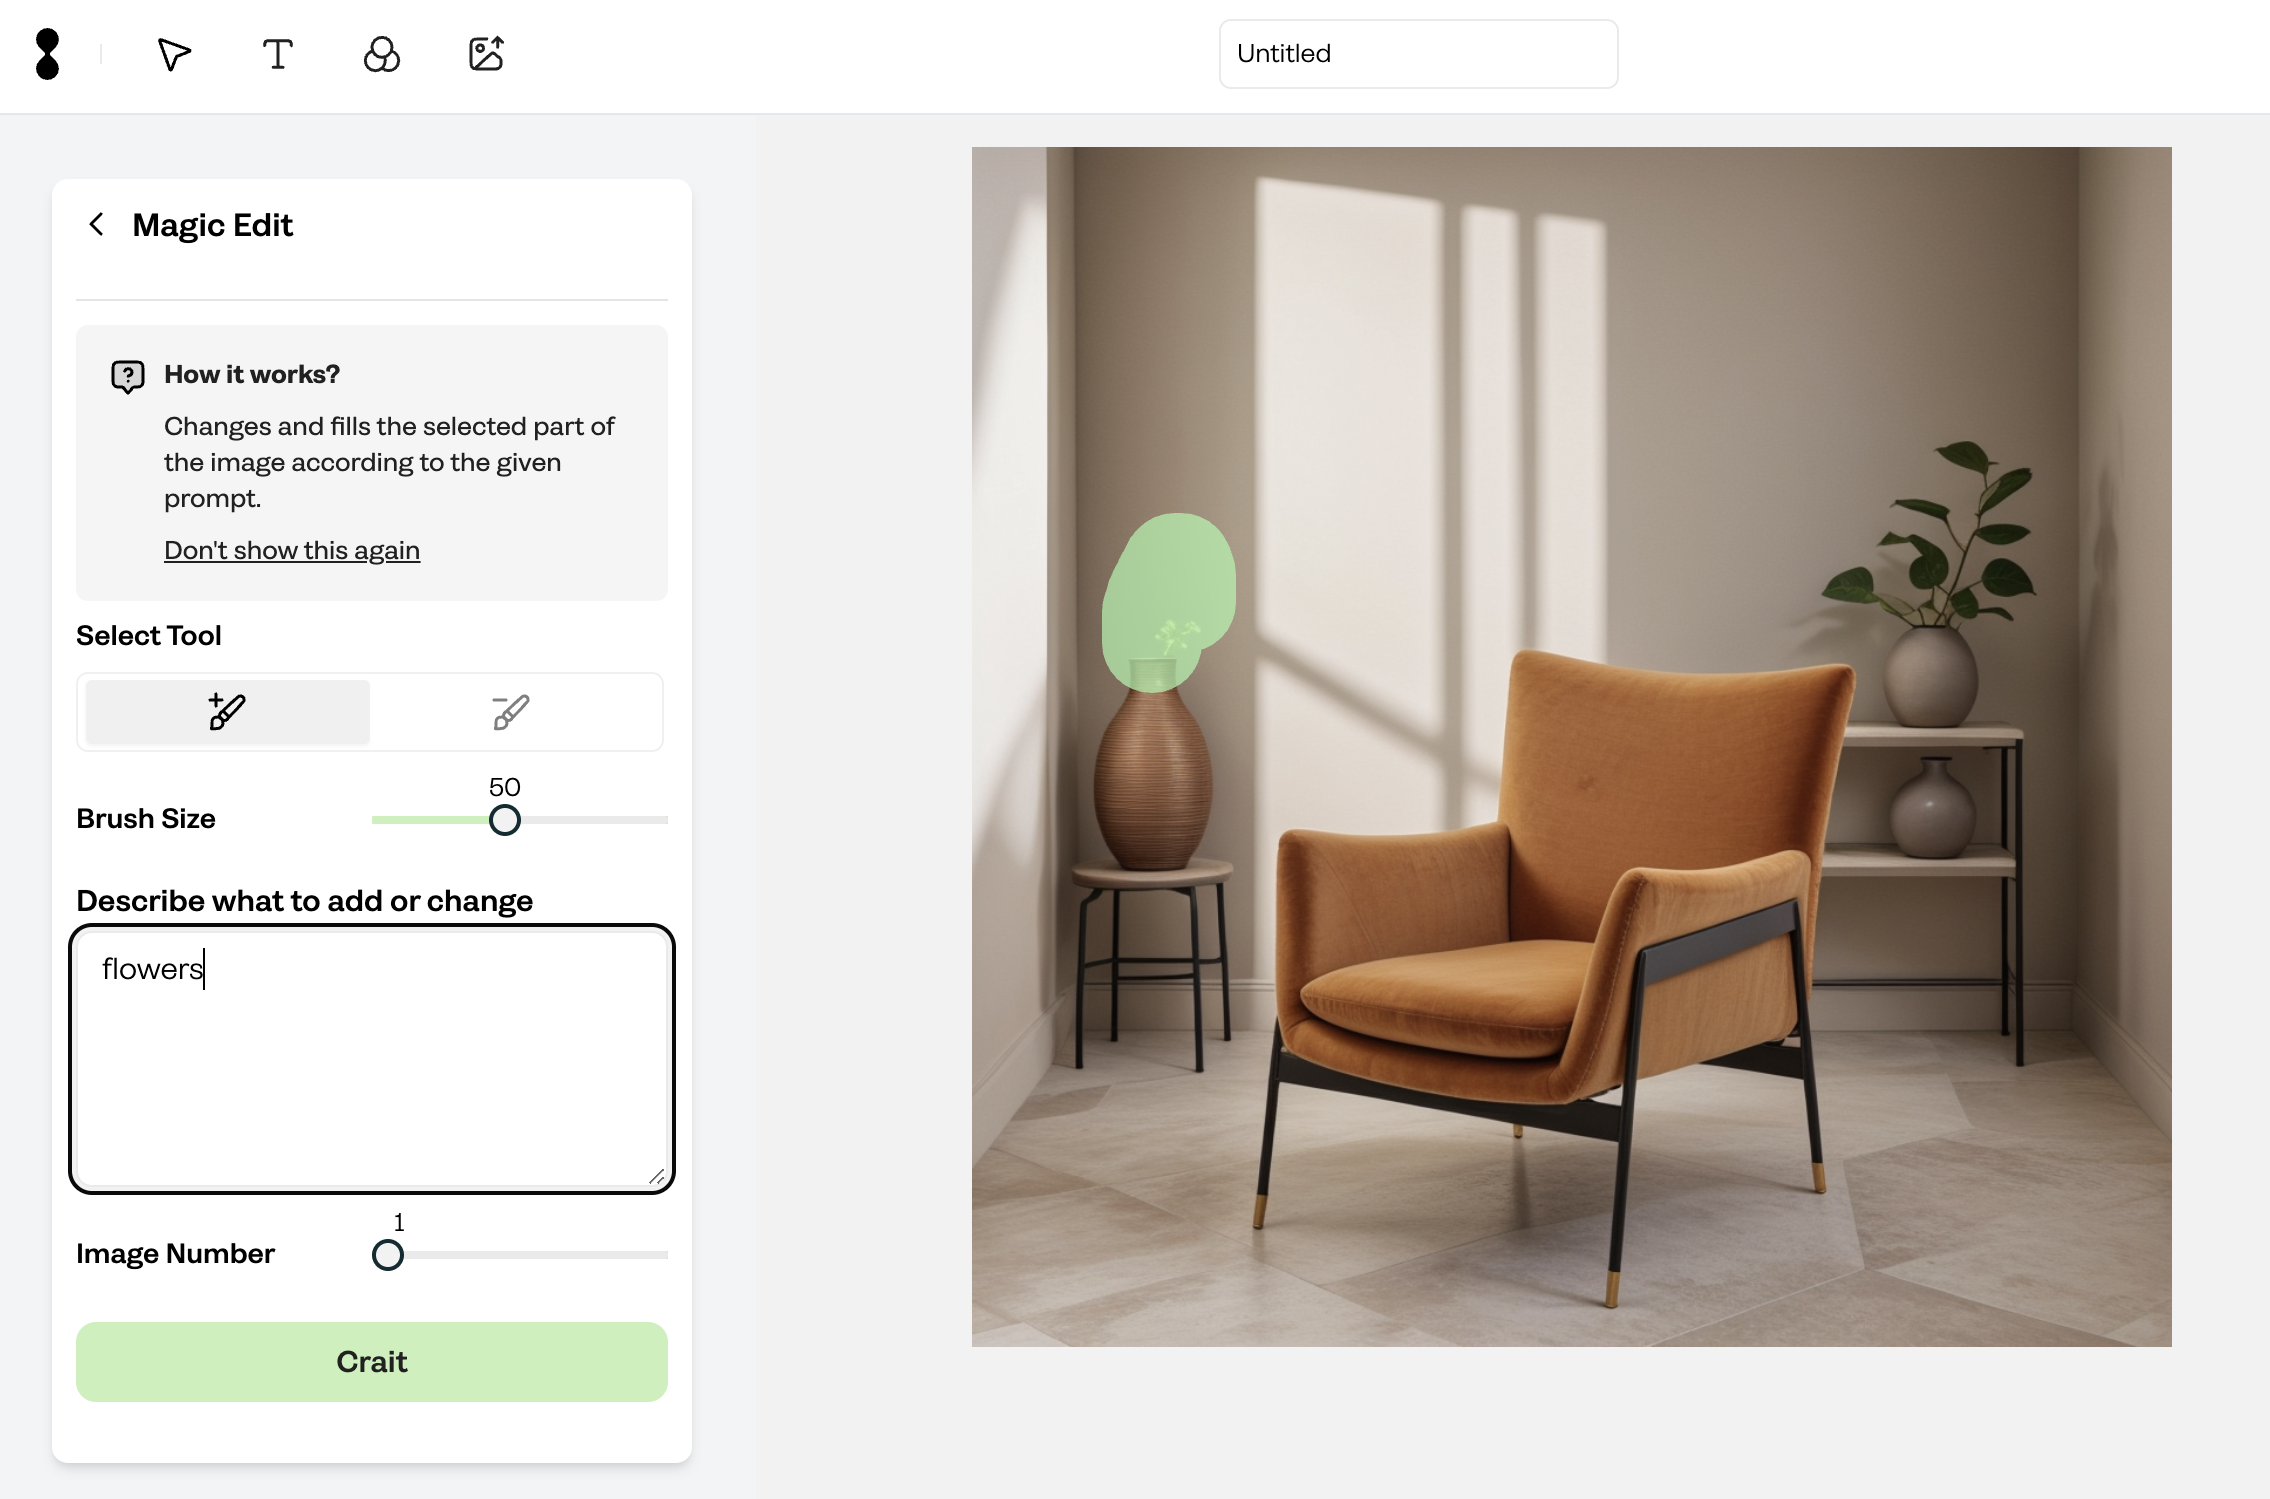
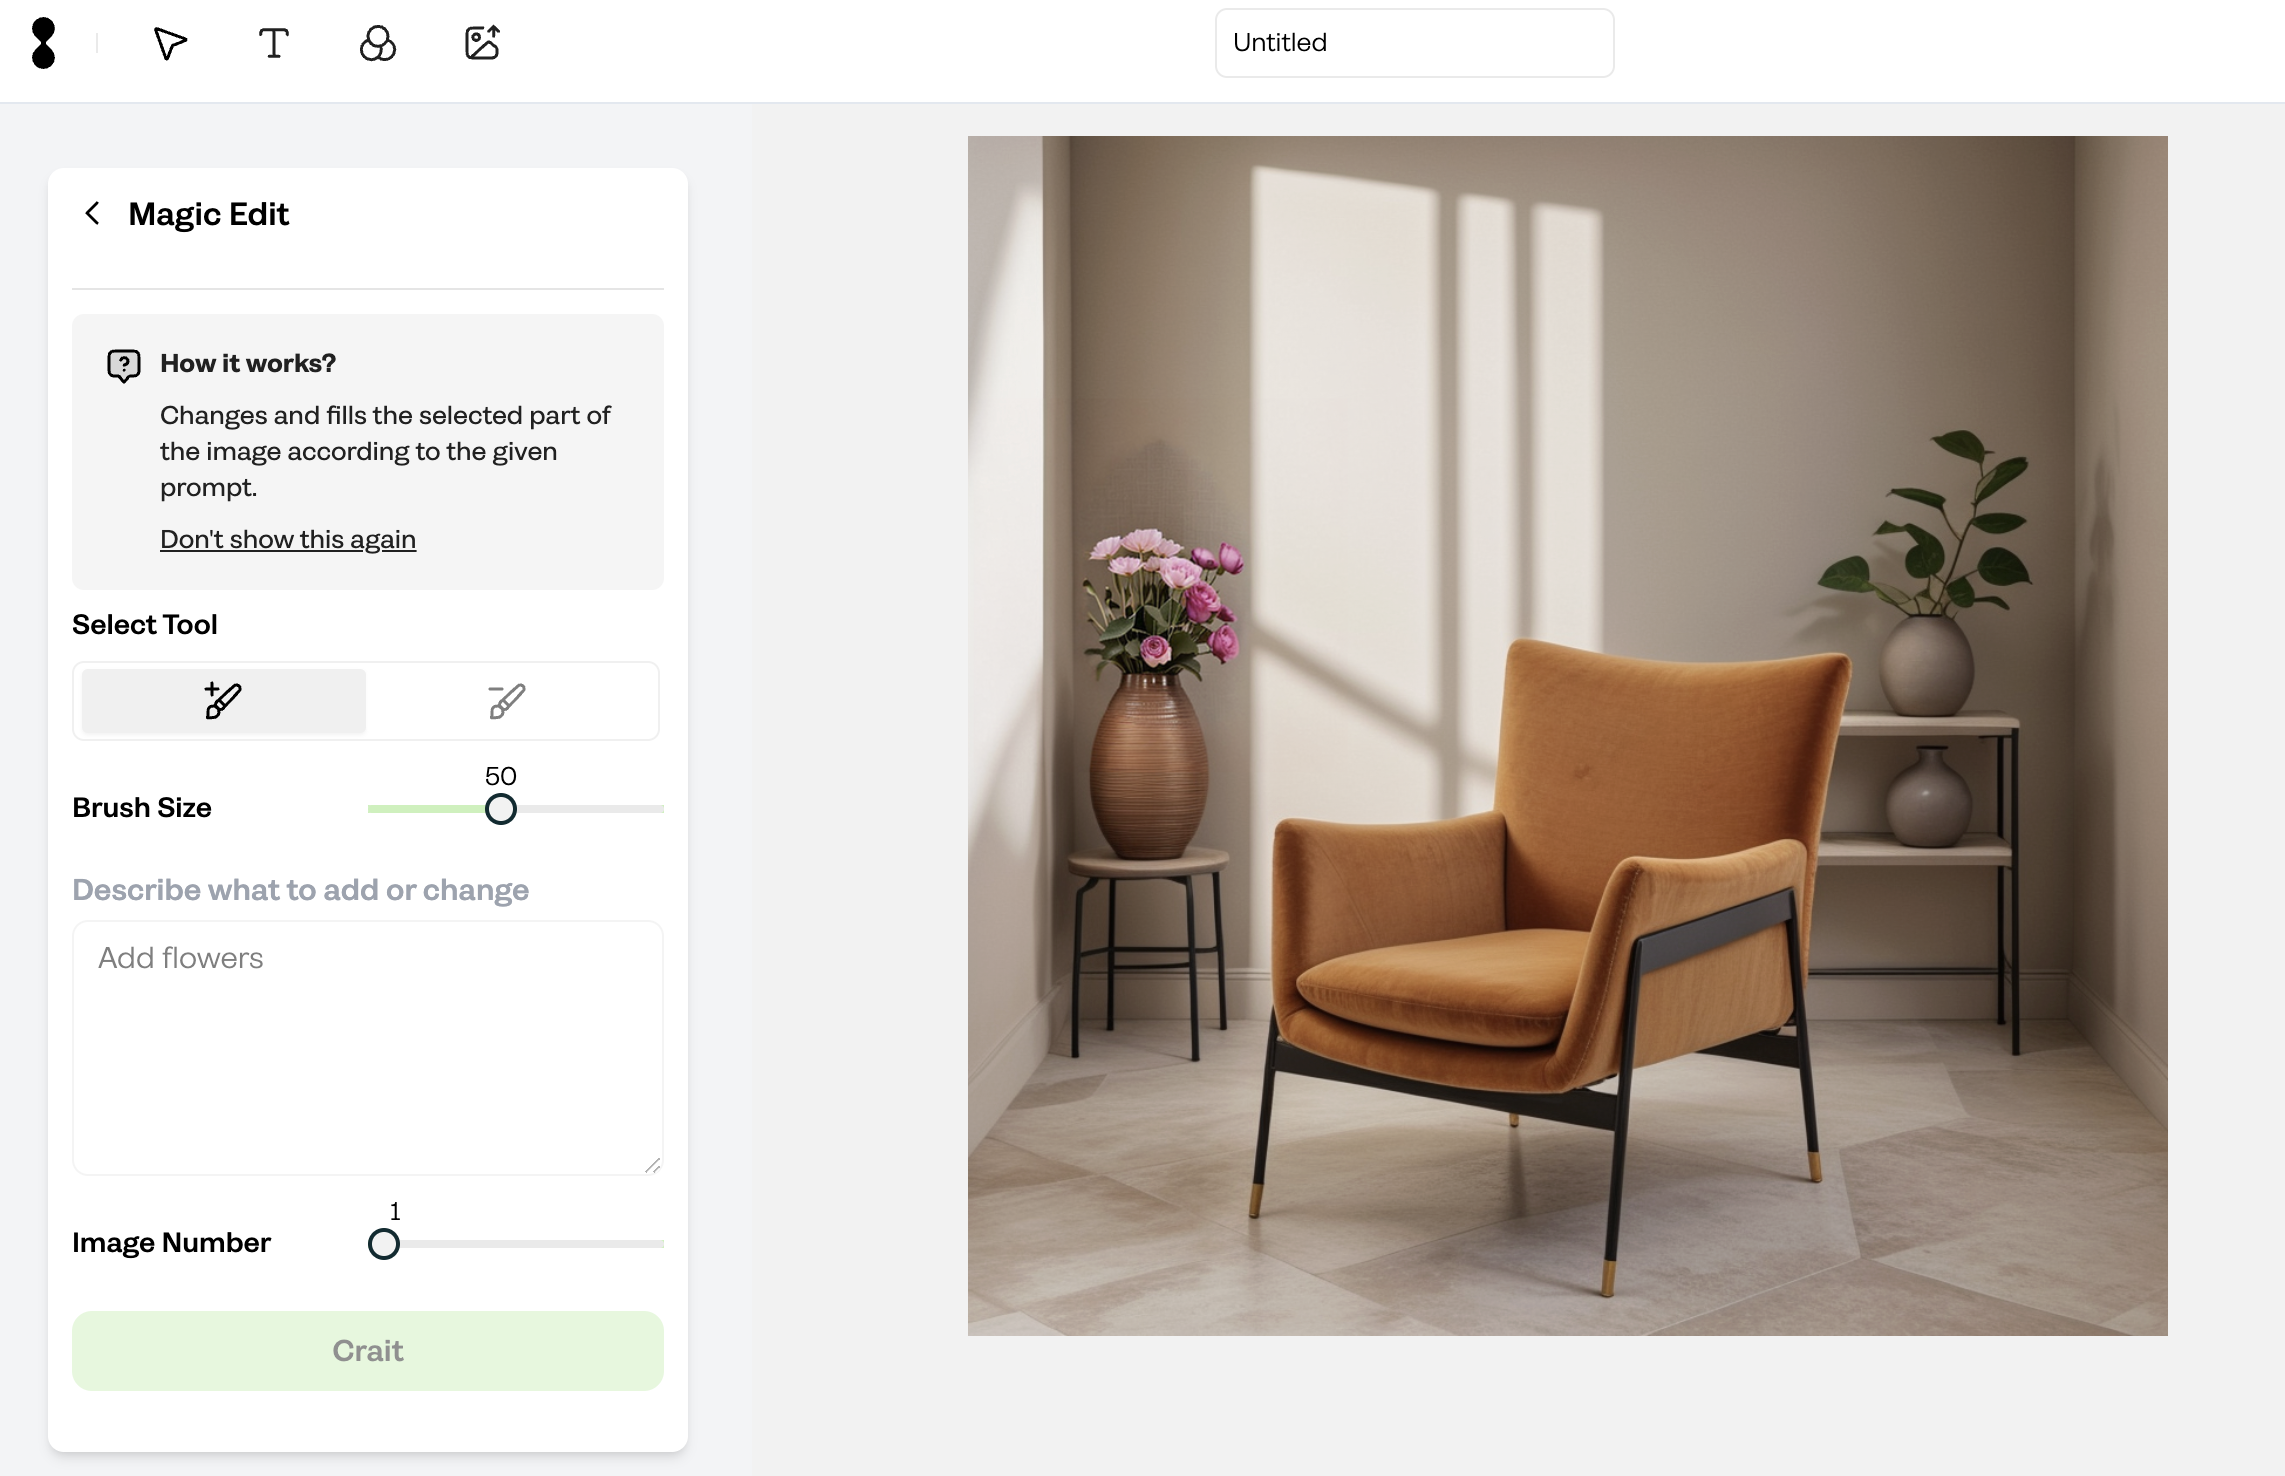
How do I use Magic Edit tool?
"Magic Edit" tool is to erase a part of the image that you do not like with AI by simply sketching. To use "Magic Edit" tool, follow these steps:
1. Once your creation is completed, review your results images on the "Result" page or in your "Projects" section on the Creative Suite tab.
2. See the "AI Edit" tools on the left menu and select the "Magic Edit"
3. Sketch the area you want to change with the brush tool and adjust the brush size.
4. Describe what you want to add or change at the image, such as 'a lemon on the counter.’
5. Choose the number of images you like to generate.
6. Click the "Crait Now"
7. Check the edited image. If satisfied, "Save" or "Download" it. If not, you can revert and try again.

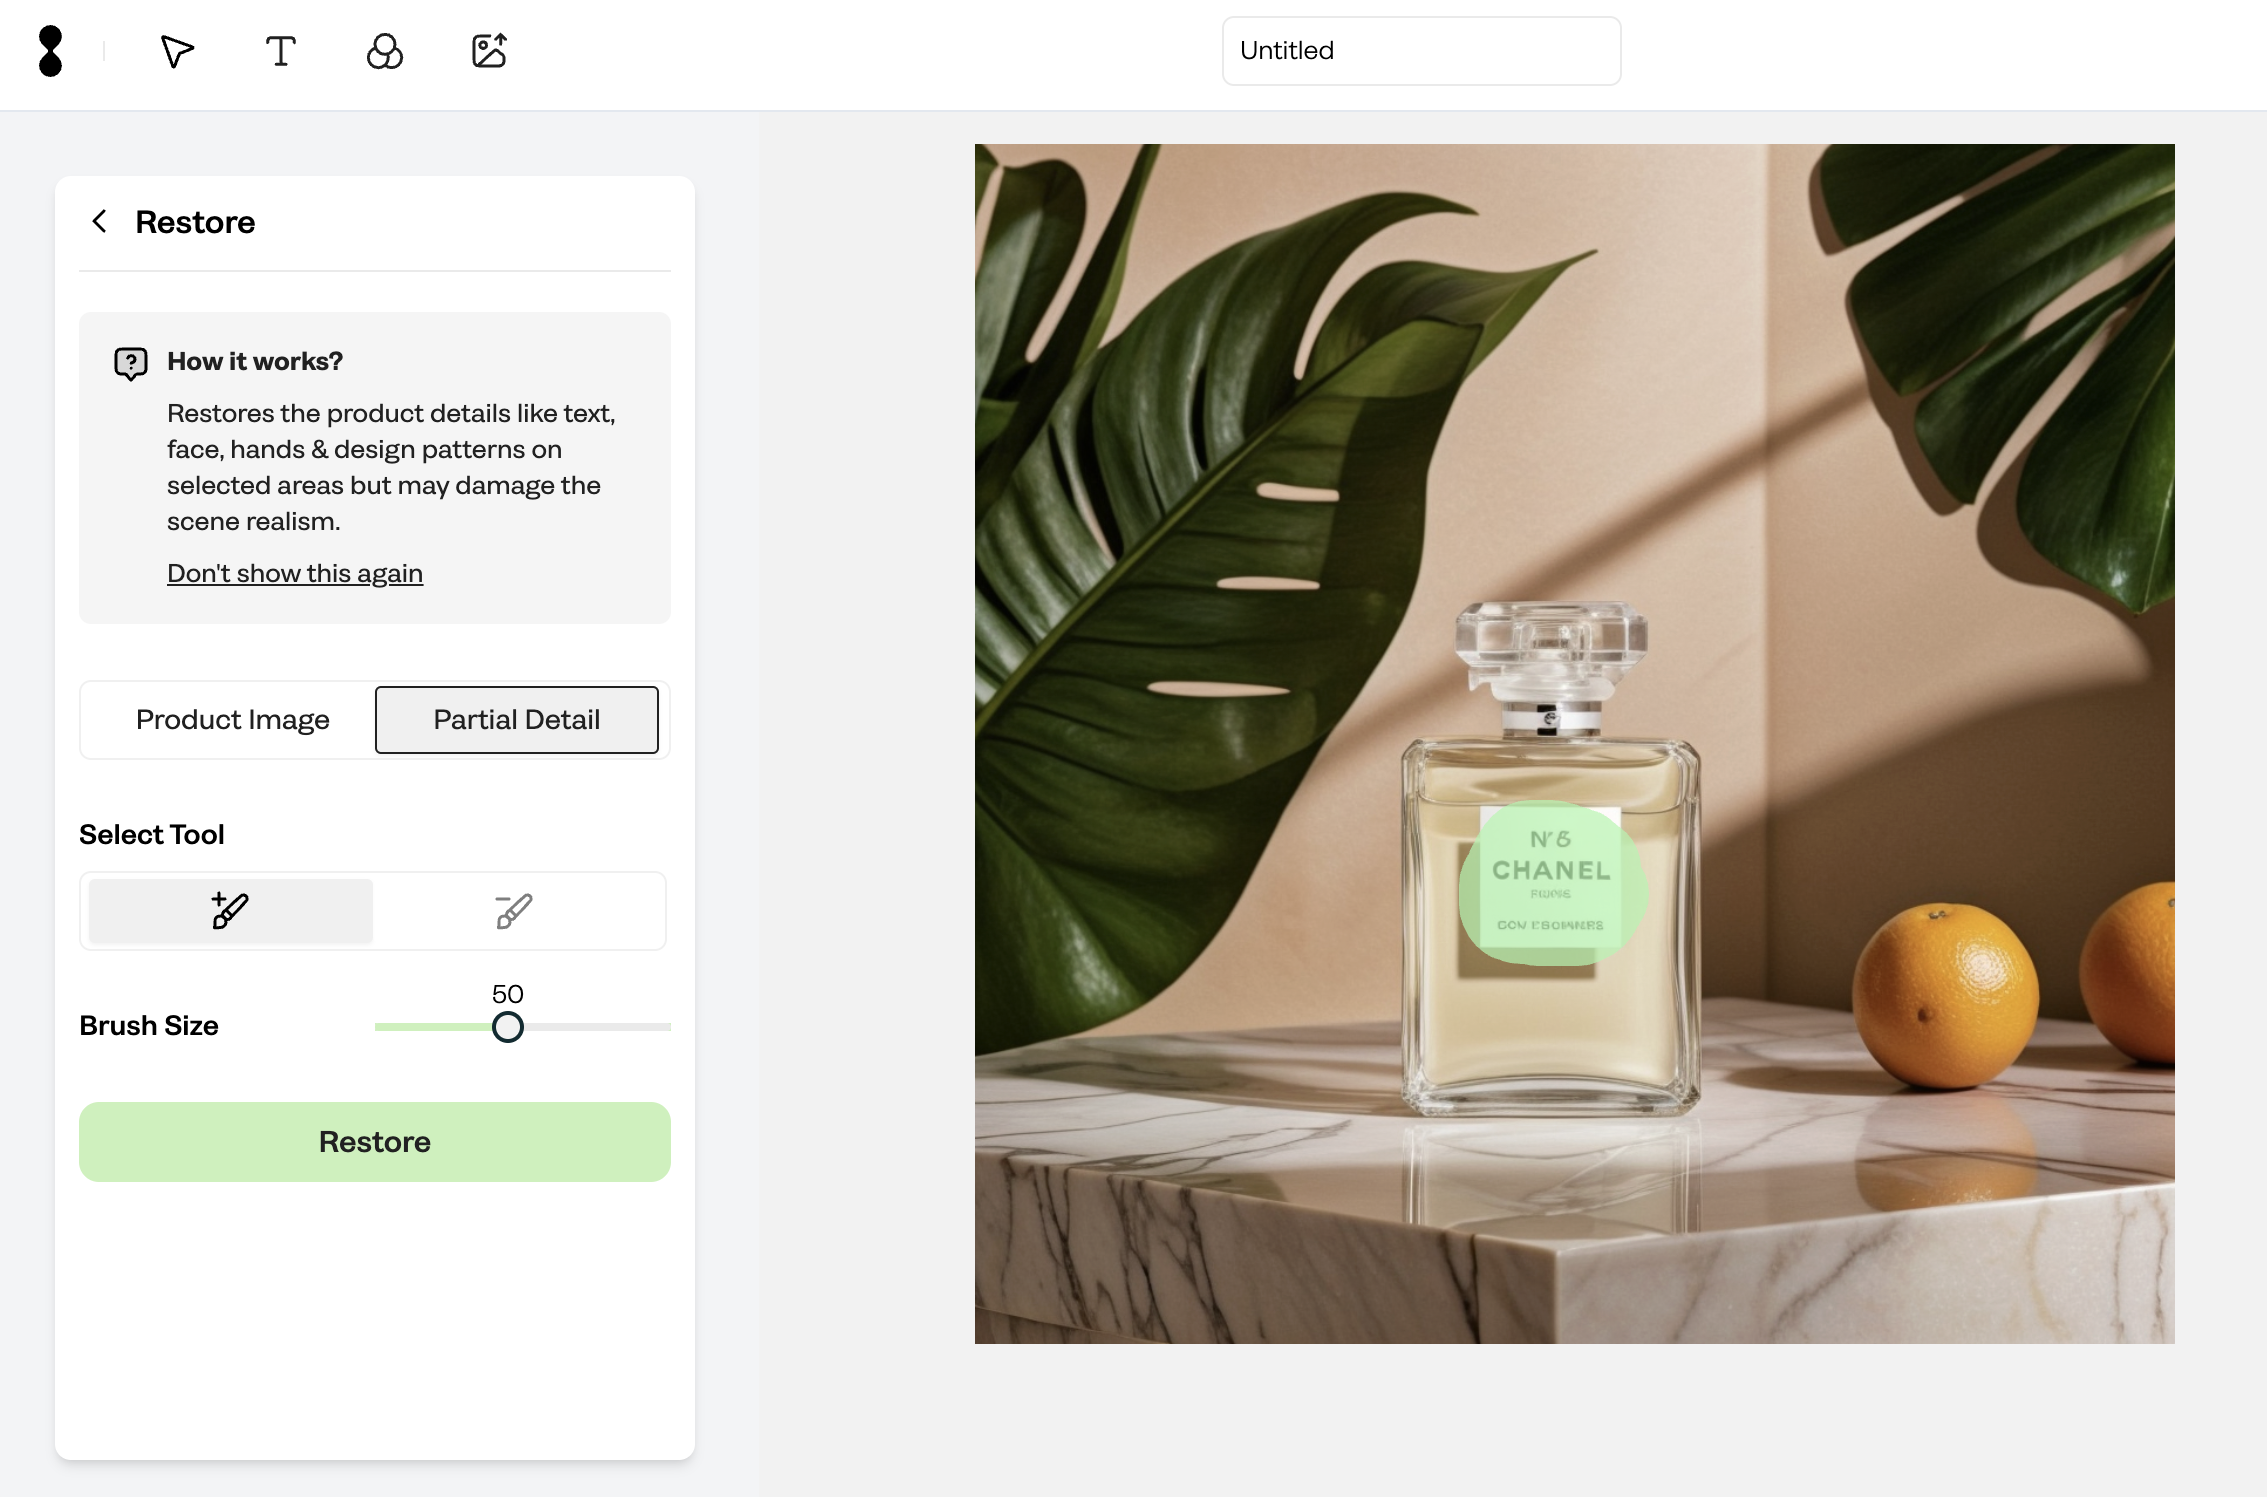
How do I use Restore tool?
Crait AI is automatically set to keep your "Product Photo" same while blending the product with the background with realistic light and shadow.
However, if you are unsatisfied with the changes, for instance AI may add some lighting to your image that you may want to avoid. Or if your product image contains one or more of these components (faces, text, hands, logos, etc.), you may experience distortions in the final image. To address this, be sure to activate the 'Face & Text Composition' feature on the "Photoshoot" page. If you are still having problems, you can fix them with the "Restore" tool.
To use "Restore" tool, there are two option:
Option 1: Restore the product image ( As a whole image)
1. Choose the scale of the balance "0 to 1 scale"
2. See the result and check the edited image.
3. If satisfied, save or export it. If not, you can revert and try again until it meets your expectations.
Option 2: Restore partially (A part of the image only for some details you want to preserve)
1. "Sketch" the part of the image you want to restore with the brush tool
2. "Apply" restore and check the edited image.
3. If satisfied, save or export it. If not, you can revert and try again until it meets your expectations.


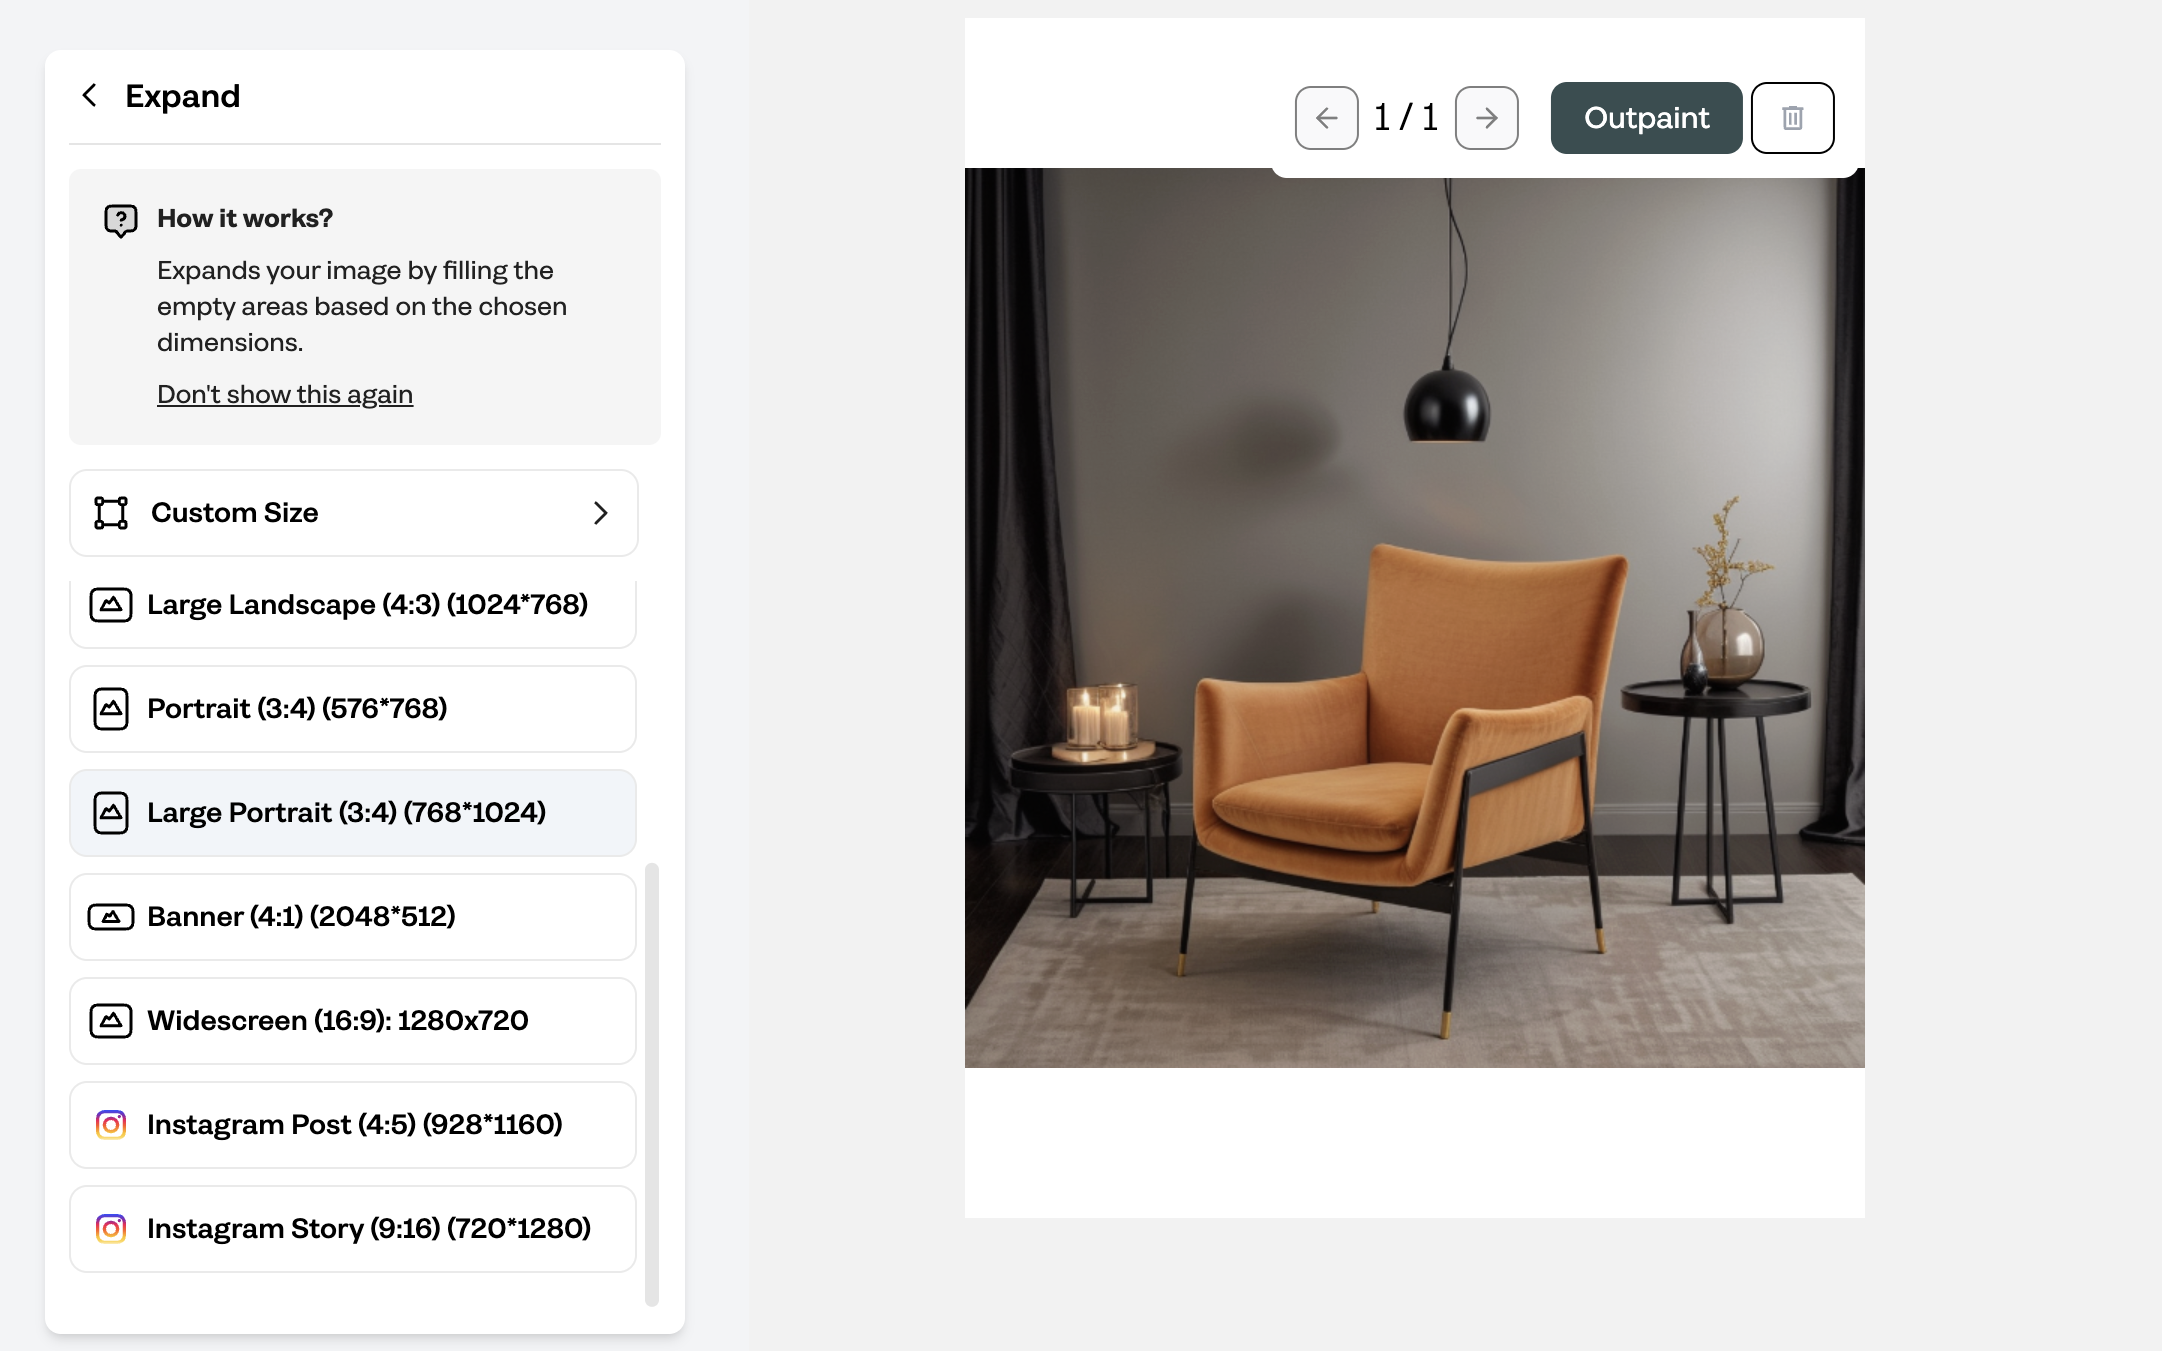
How do I use Expand tool?
"Expand tool" is helping you to change the dimensions of your image by expanding the image from its borders.
To use "Expand Tool" , follow these steps:
1. Once your creation is completed, review your results images on the "Result"
page or in your "Projects" section on the Creative Suite tab.
2. See the "AI Edit" tools on the left menu and select the "Expand"
3. Choose sizes from the list, you can enter custom sizes, too.
4. Once you select your desired dimensions, you will see a positioning option at the canvas.
5. Position your image at the canvas to choose the areas to expand.
6. Click the “Outpaint” and apply your image. The AI will process and make the necessary adjustments.
7. Check the edited image. If satisfied, "Save" or "Download" it. If not, you can revert and try again.
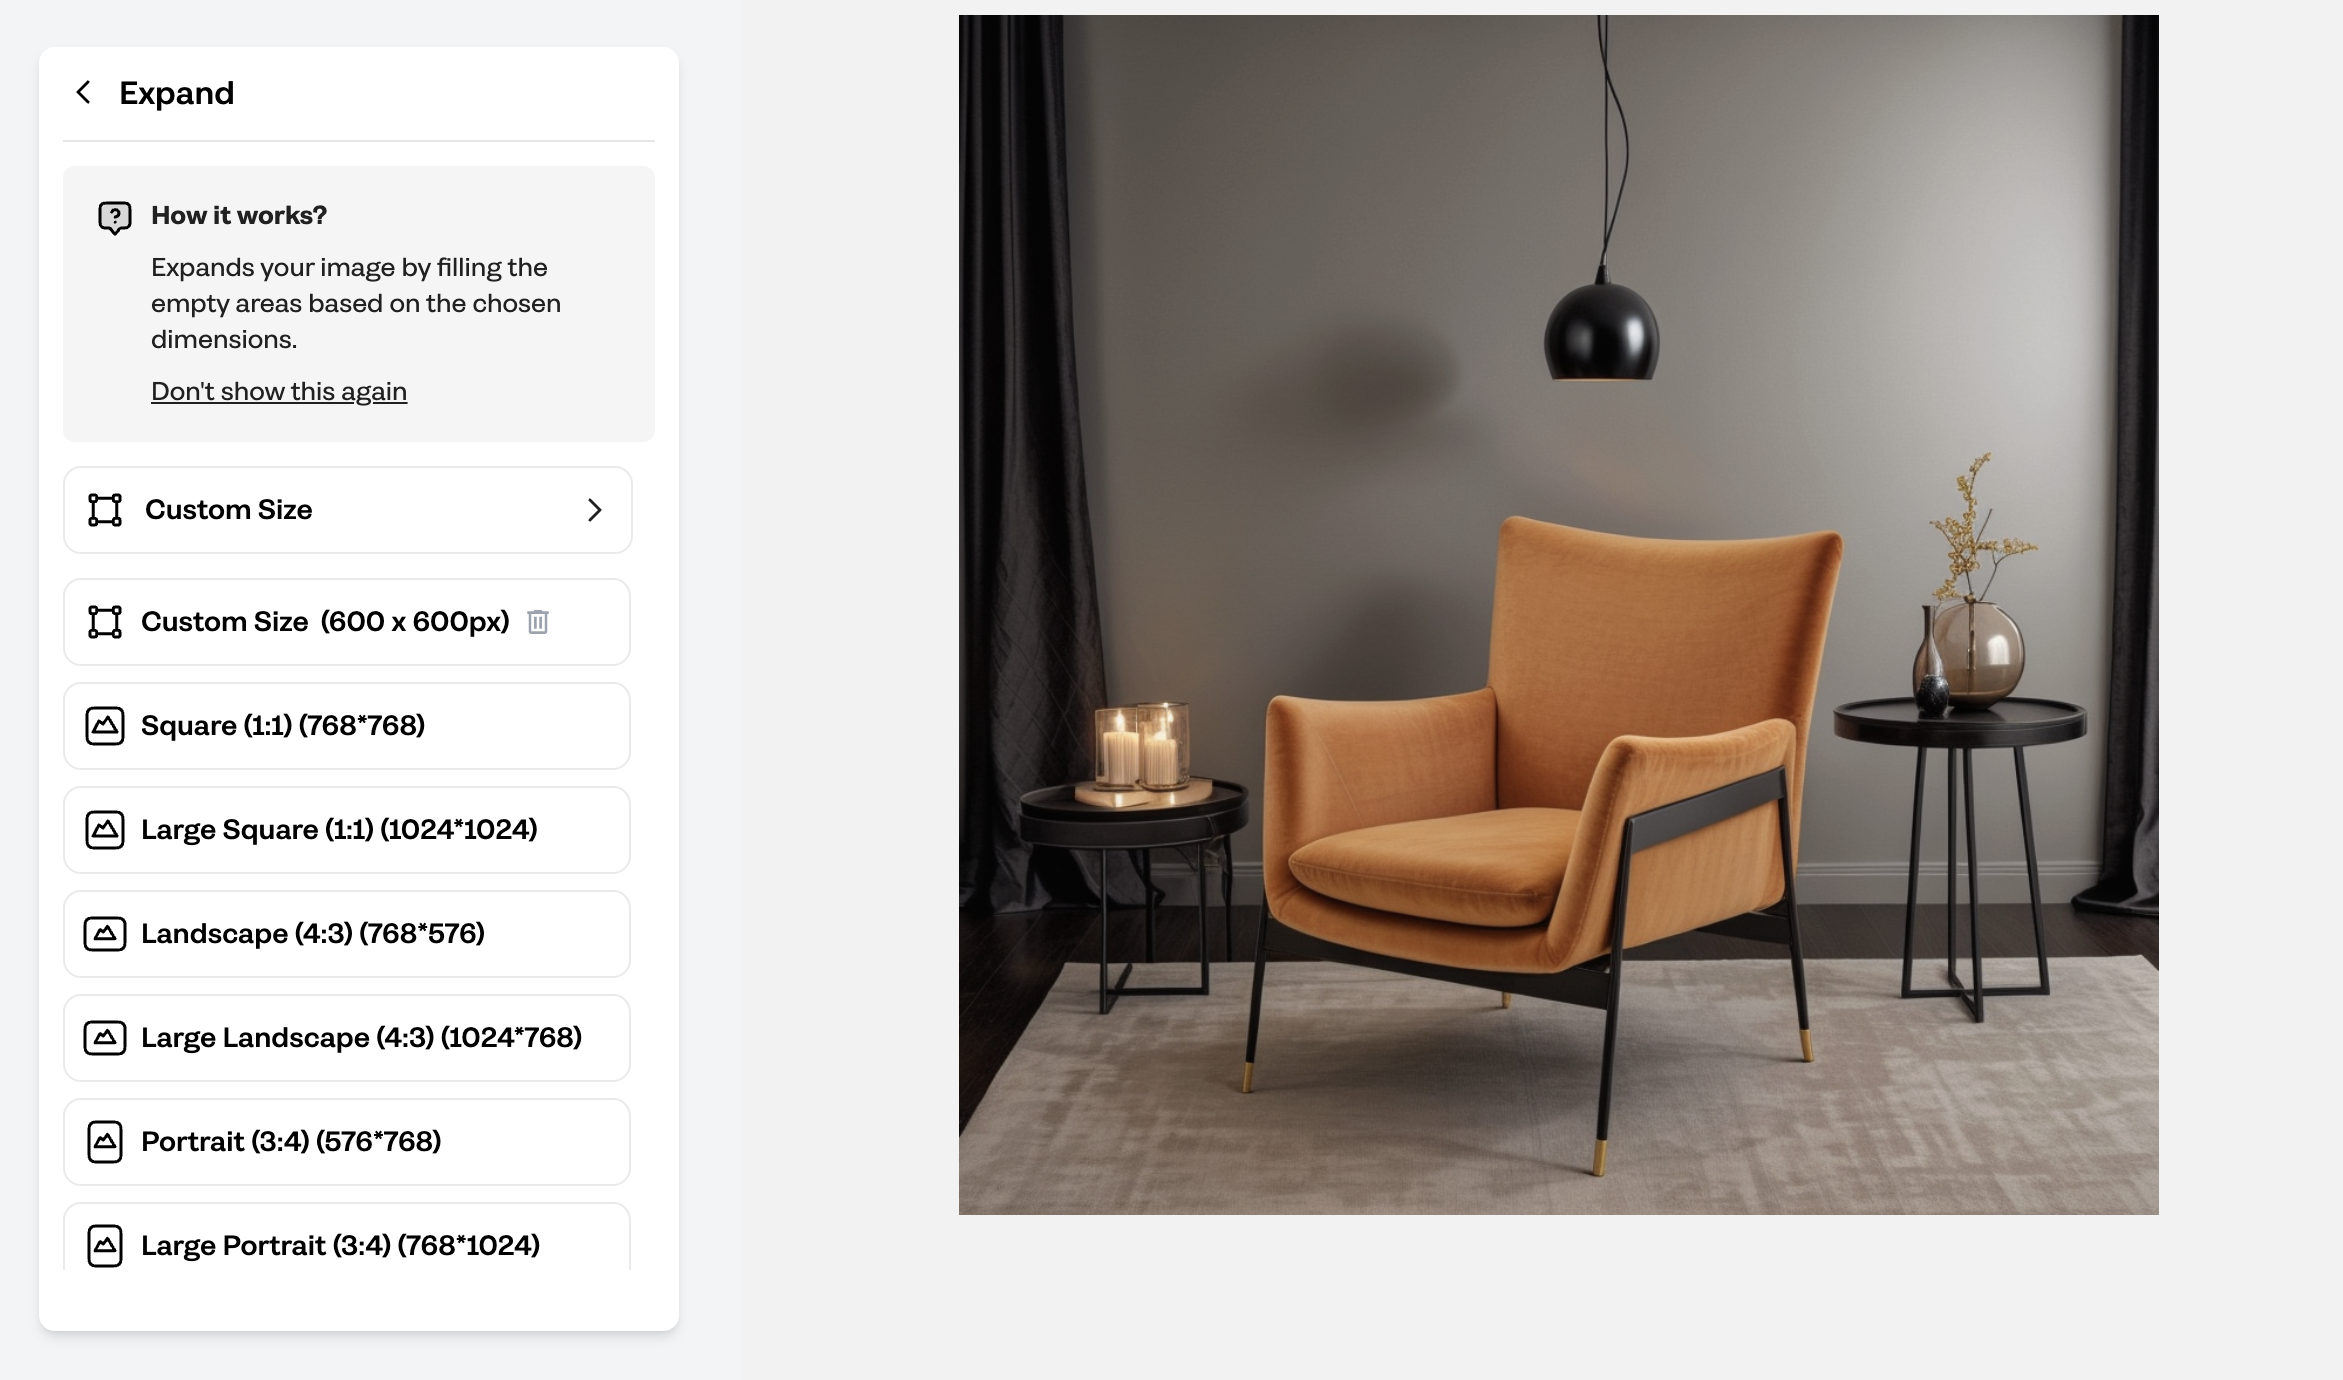
Tip: as the expanding region increases, there can be a noticeable loss in the content fidelity of the original image. To address this, we recommend adopting an iterative expanding approach. For instance, you can progressively increase the expanding scale from 1:1 to 1:2, then from 1:2 to 1:3, and finally to 1:4. This method helps to gradually adapt the extended areas, thereby better preserving the context and integrity of the original image.
How do I use Crop tool?
"Crop Tool" is helping you to change the dimensions of your image by cropping the image by selecting a part of the image.
To use "Crop Tool", follow these steps:
1. Once your creation is completed, review your results images on the "Result" page or in your "Projects" section on the Creative Suite tab.
2. See the "AI Edit" tools on the left menu and select the "Crop"
3. Choose sizes from the list, you can enter custom sizes, too.
4. Once you select your desired dimensions, you will see a positining option at the canvas.
5. Position your image at the canvas to choose the areas to expand.
6. Click the "Crait Now" and apply your image. The AI will process and make the necessary adjustments.
7. Check the edited image. If satisfied, "Save" or "Download" it. If not, you can revert and try again.
What I do if don't like and want to remove a part of the image?
"Magic Erase" tool is to erase a part of the image that you do not like with AI by simply sketching.
To use "Magic Erase" tool, follow these steps:
1. Once your creation is completed, review your results images on the "Result" page or in your "Projects" section on the Creative Suite tab.
2. See the "AI Edit" tools on the left menu and select the "Magic Erase"
3. Use the brush tool and sketch the area you want to erase. You can adjust brush size.
4. Click the "Erase" and apply your image. The AI will process and make the necessary adjustments.
5. Check the edited image. If satisfied, "Save" or "Download"
it. If not, you can revert and try again.
You can activate "Magic Eraser Pro" feature for "Professional Package"
and upper.
Visit https://www.crait.it/pricing for details.
This feature provides better image quality while erasing a part of the image.
How do I change a part of the image?
"Magic Edit" tool is to erase a part of the image that you do not like with AI by simply sketching.
To use "Magic Edit" tool, follow these steps:
1. Once your creation is completed, review your results images on the "Result" page or in your "Projects" section on the Creative Suite tab.
2. See the "AI Edit" tools on the left menu and select the "Magic Edit"
3. Use the brush tool and sketch the area you want to erase. You can adjust brush size.
4. Write down what you want to add or change at the image.
5. Choose the number of images you like to generate.
6. Click the "Crait Now"
7. Check the edited image. If satisfied, "Save" or "Download" it. If not, you can revert and try again

How to preserve the details of my product?
Crait AI is automatically set to keep your "Product Photo" same while blending the product with the background with realistic light and shadow. However, if you are unsatisfied with the changes, for instance AI may add some lighting to your image that you may want to avoid. "Restore" tool is to solve this problem. In these cases, Crait offers you to find a good balance between "0 to 1 scale" to keep your product intact.
To use "Restore" tool, there are two option:
Option 1: Restore the product image ( As a whole image)
1. Choose the scale of the balance "0 to 1 scale"
2. See the result and check the edited image.
3. If satisfied, save or export it. If not, you can revert and try again until it meets your expectations.
Option 2: Restore partially (A part of the image only for some details you want to preserve)
1. "Sketch" the part of the image you want to restore with the brush tool
2. "Apply" restore and check the edited image.
3. If satisfied, save or export it. If not, you can revert and try again until it meets your expectations.

How do I use Enhance Quality tool?
You can increase the quality of your images by clicking on the Enhance Quality tool.
This feature adds details to the scene and increases the resolution of the image.
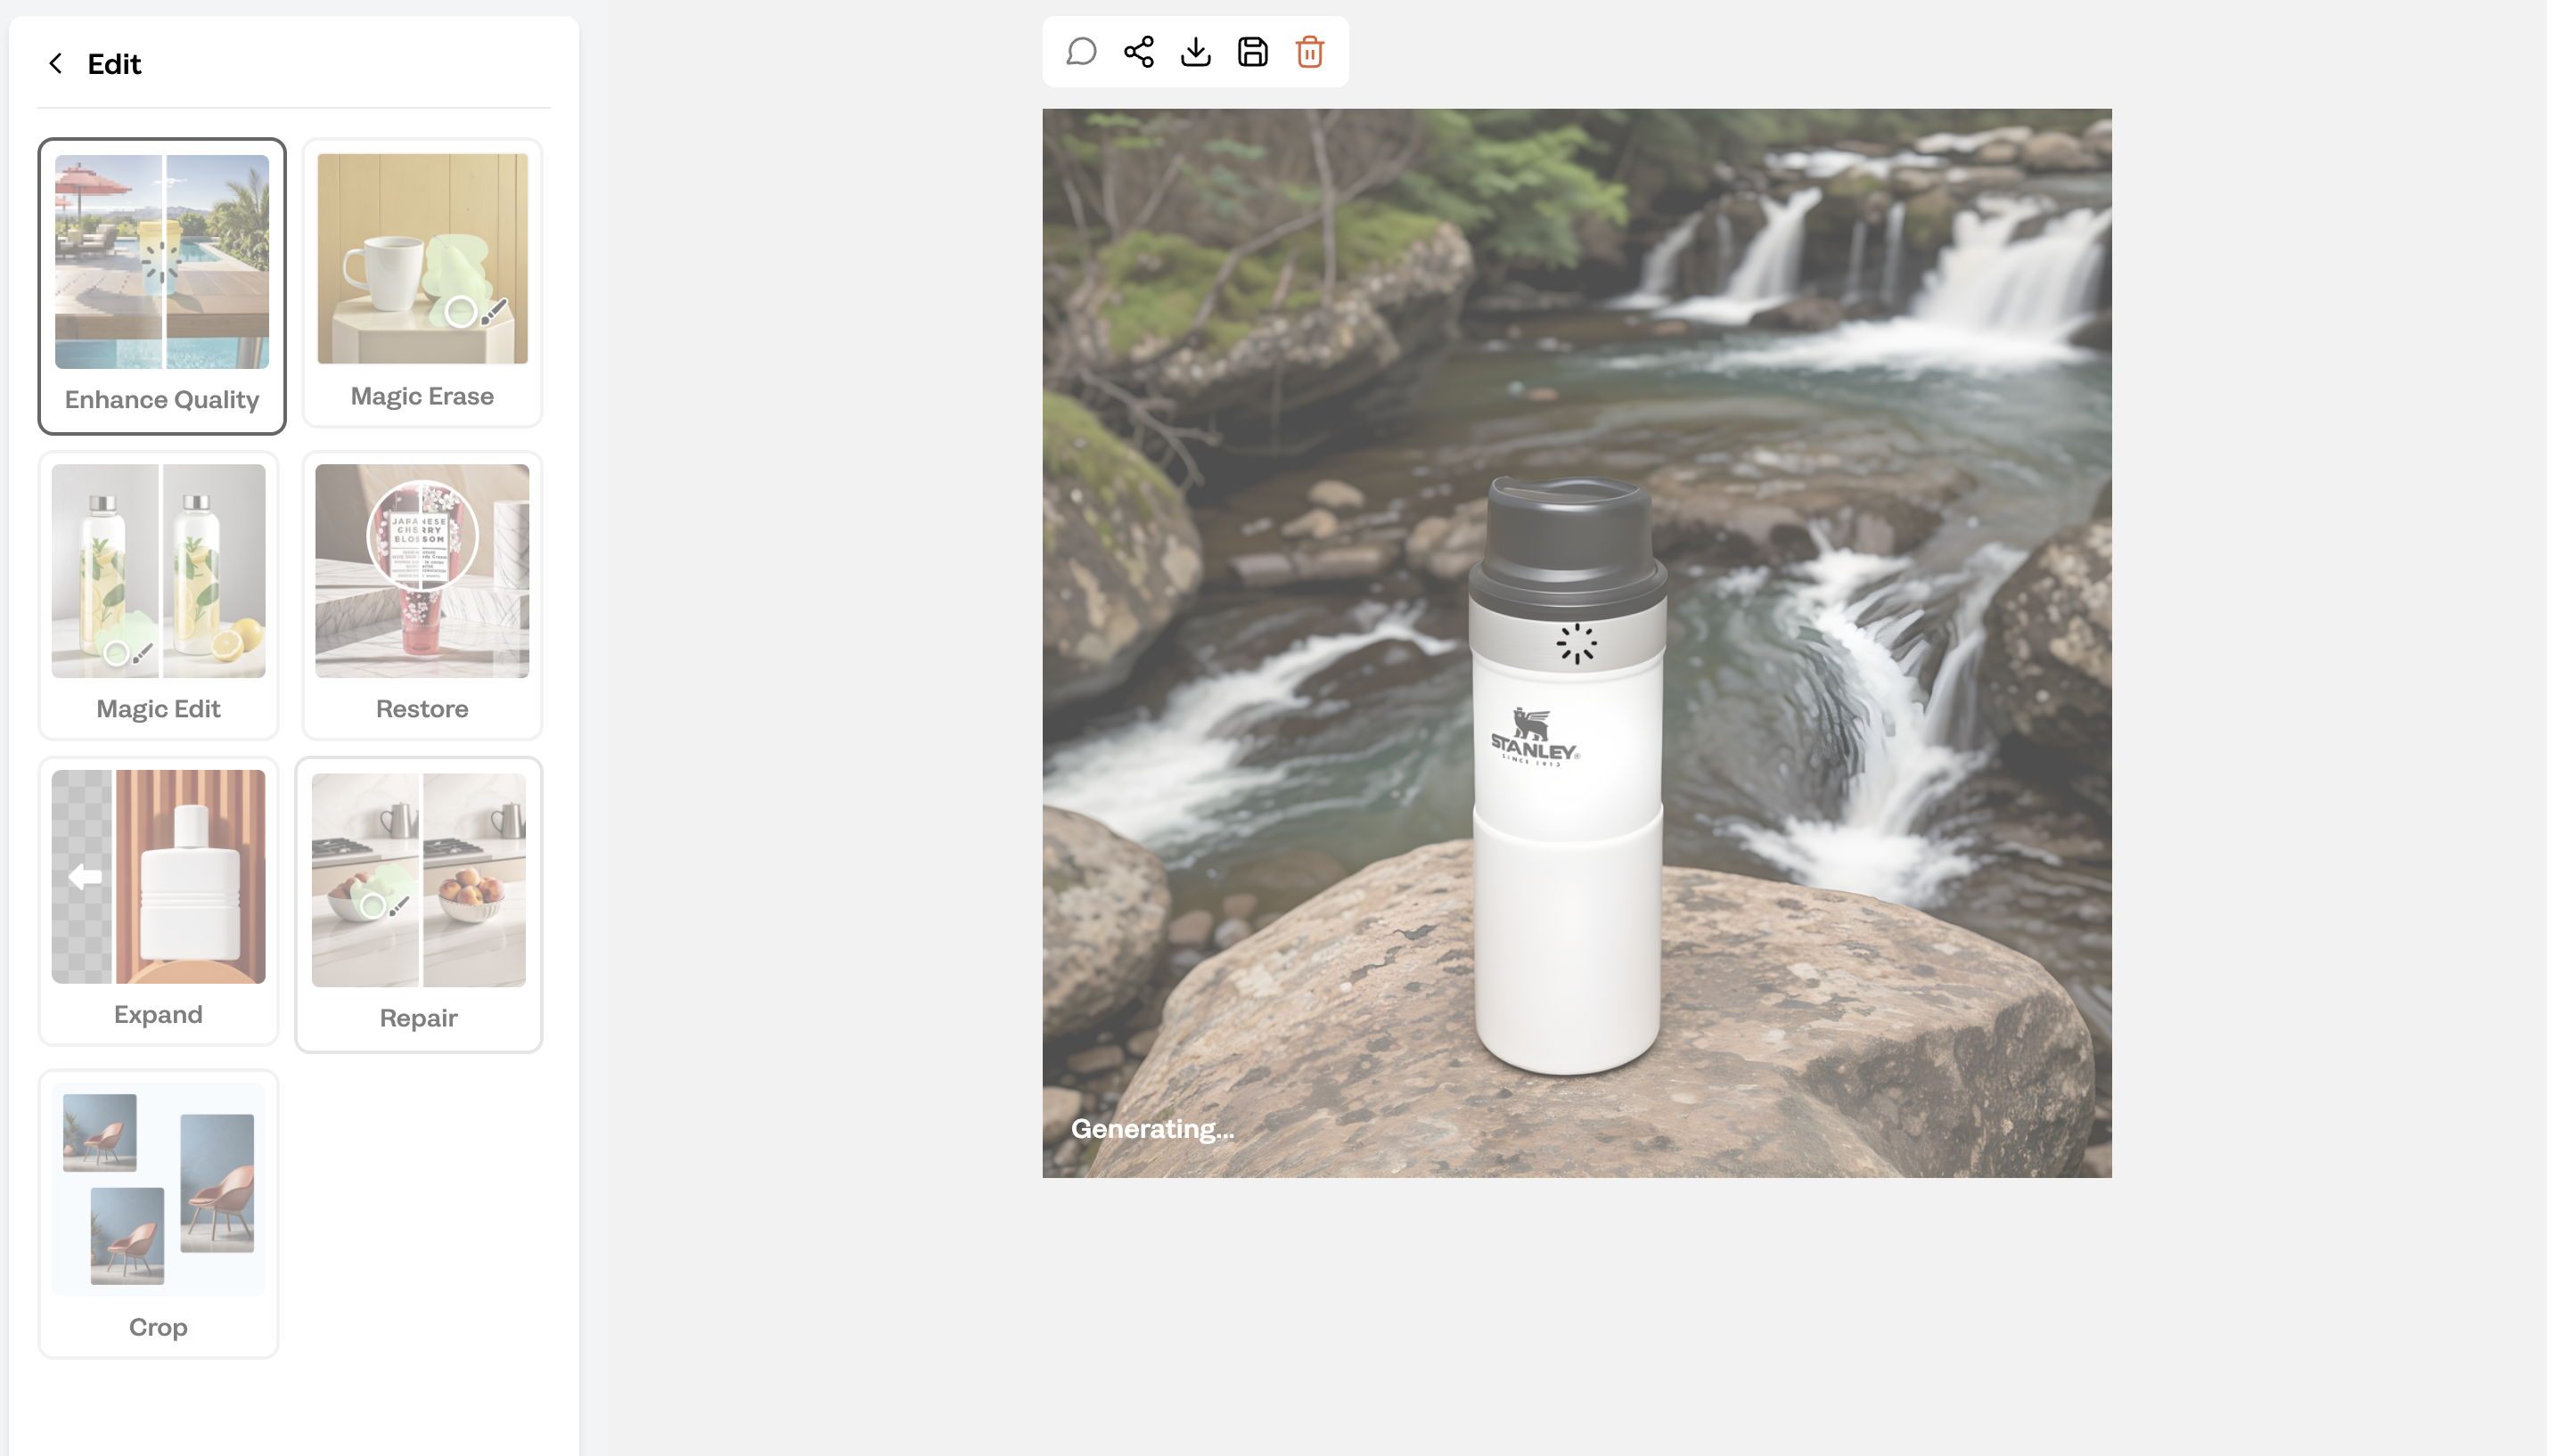
How do I use Repair tool?
You can use the AI Edit and Magic Erase tools to enhance and clean specific parts of the image. However, if you prefer to adjust an image by correcting any AI-generated anomalies, you can use the Repair tool. Simply click on it to see the improvements applied to the image.