How do I use Photoshoot tool?
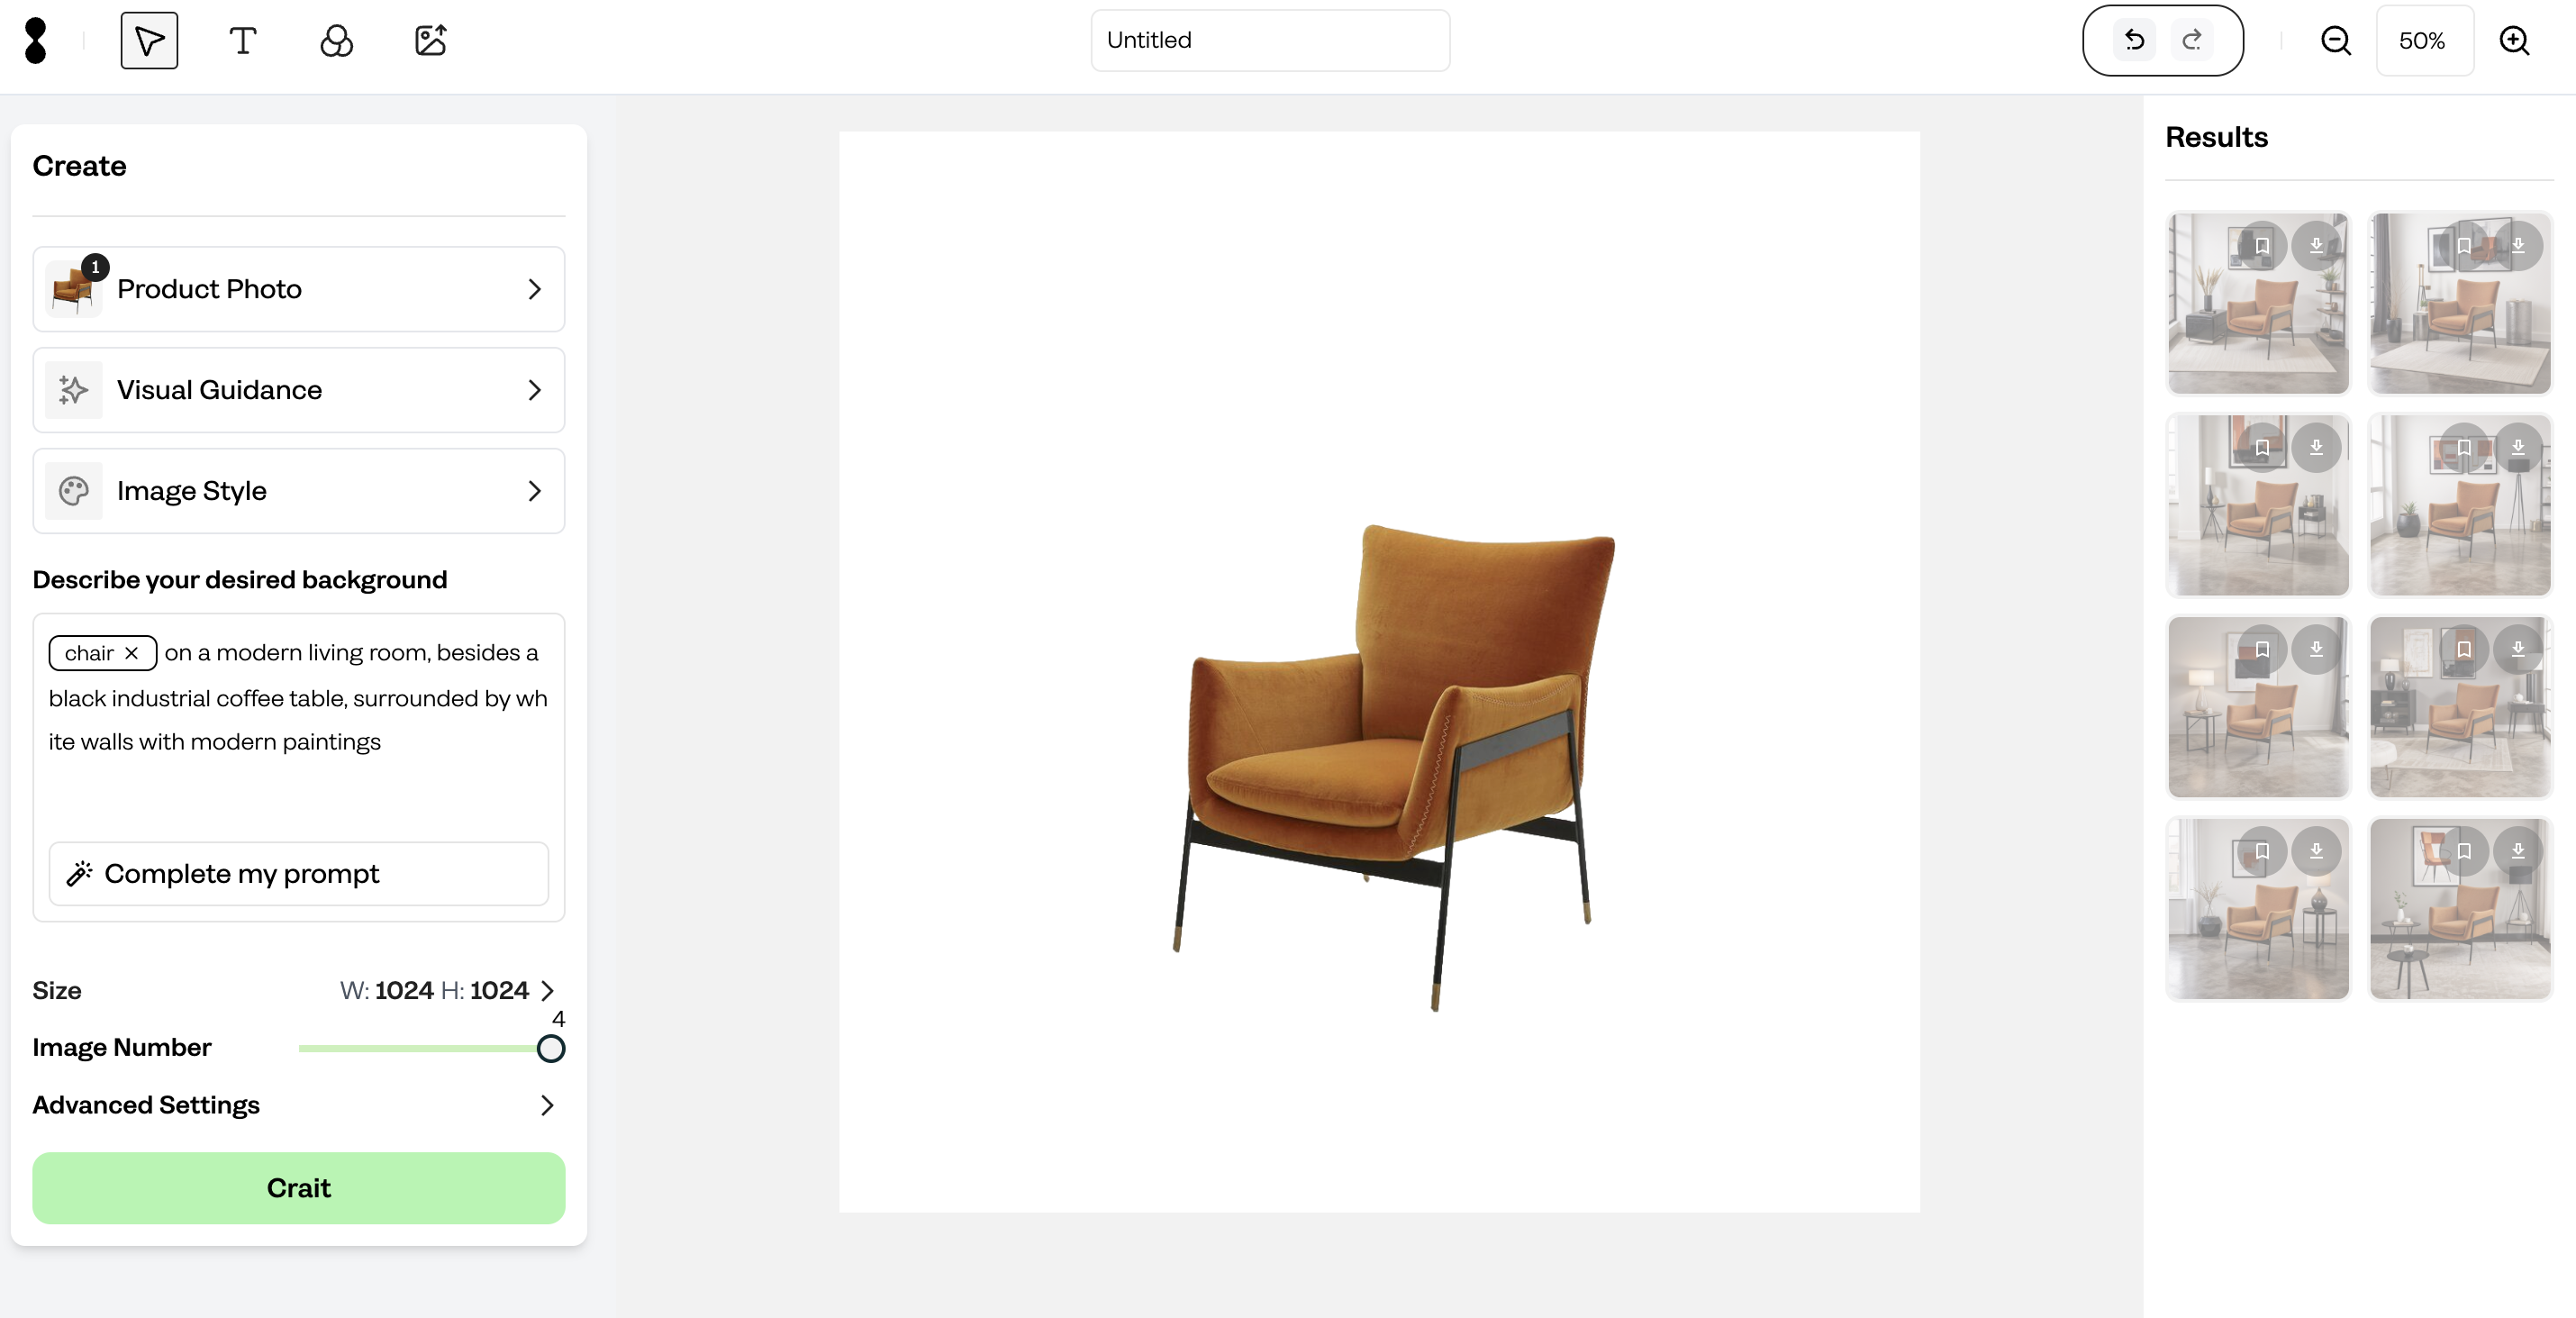
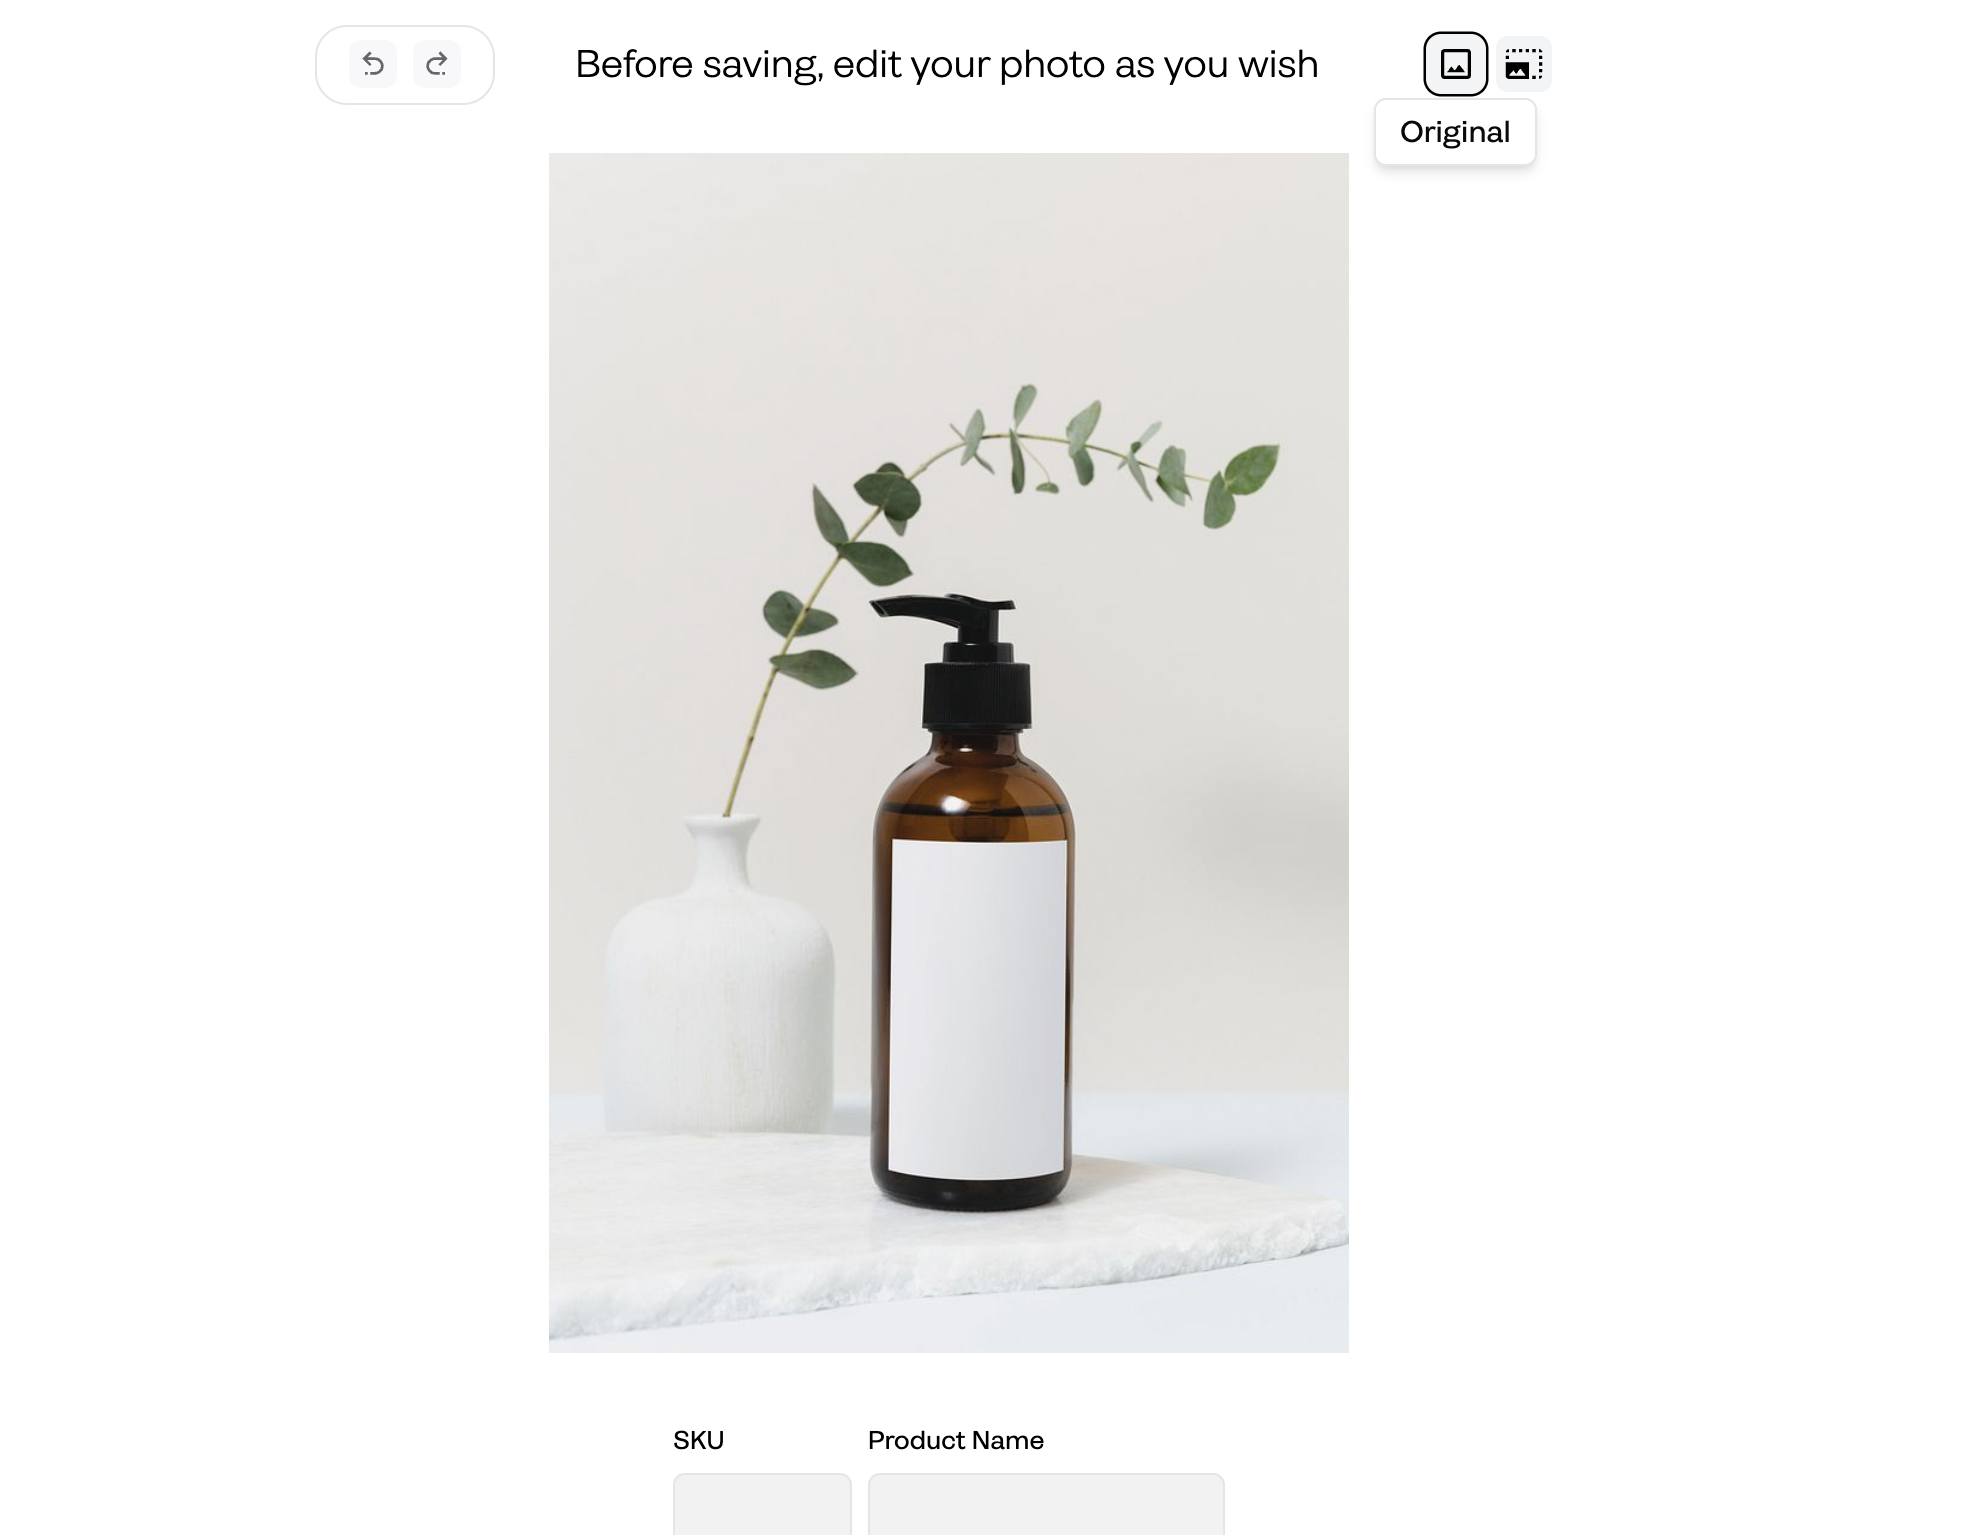
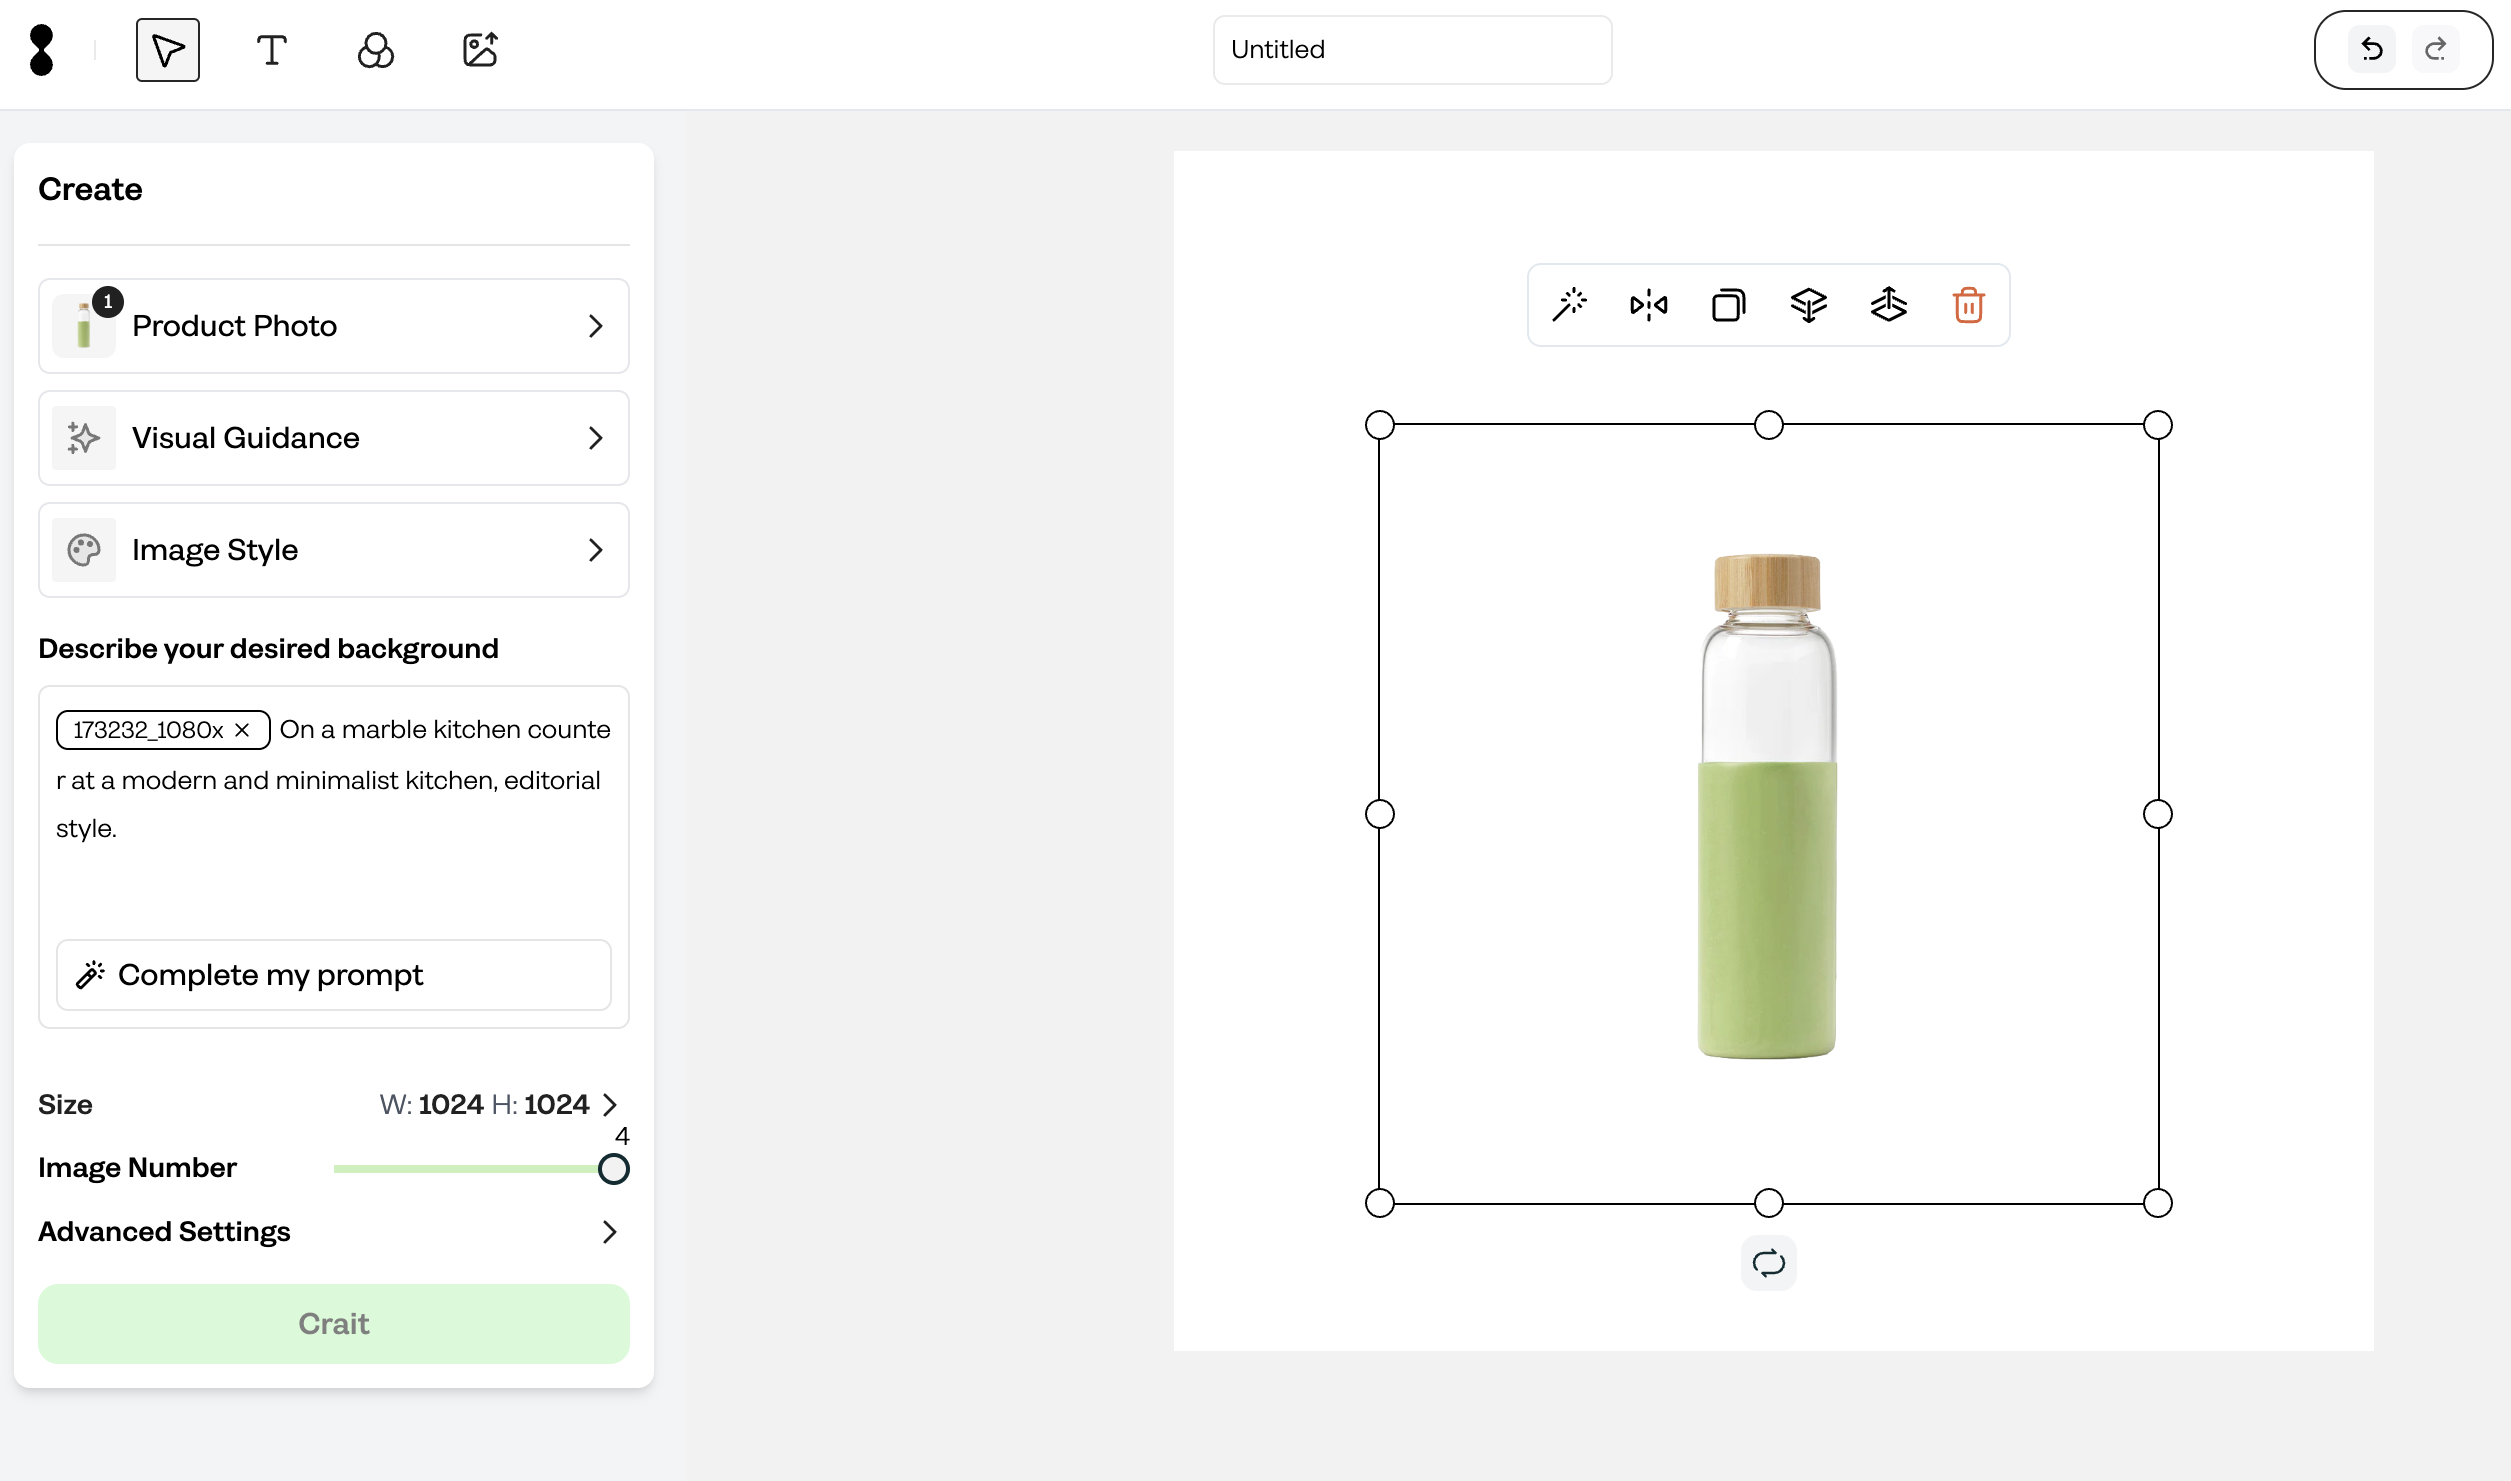
To use the Photoshoot tool, follow these steps: 1. On the dashboard, click the "Create Now" button, then click the "Photoshoot" section. 2. Choose a product from "Product Photo" section or "Upload" a new one from your computer. 3. Position or arrange the dimension of your product on the canvas. 4. Write the "Prompts" to set up your photoshoot environment or select the "Templates" or "Inspiration" from "Visual Guidance"section to create. 5. Choose the size or enter a custom size. 6. Choose how many images you like to generate from 1 to 4. 7. Go to the "Advance Settings" section and activate "Face & Text Composition" if your product image including face, text or hands. 8. Go to the "Advance Settings" section and activate "Exclude My Background" then describe what do you want to avoid from your background. 9. To generate your image click the "Crait Now" buton. 10. To use "AI edit" tools if you needs, click the "Edit" buton on the image. 11. Once satisfied with the result, "Save" and "Download" your image to use.
Where do I see my previous photoshoot projects?
To see your previous projects, follow these steps:
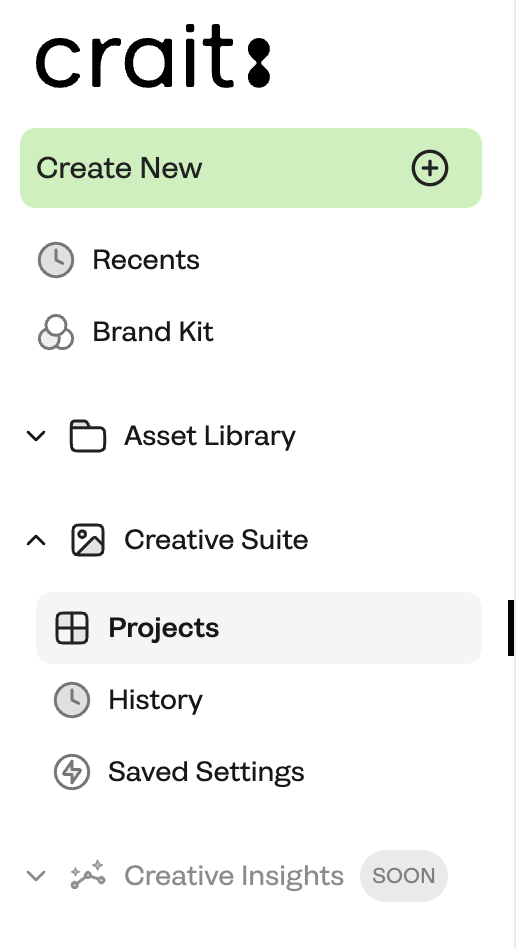
1. On the dashboard, click the "Creative Suite" button then click the "Projects" section.
2. Browse through the list of your previous projects. You can search or filter the list if needed.
Where do I see my previous creations?
To see your previous creations, follow these steps:
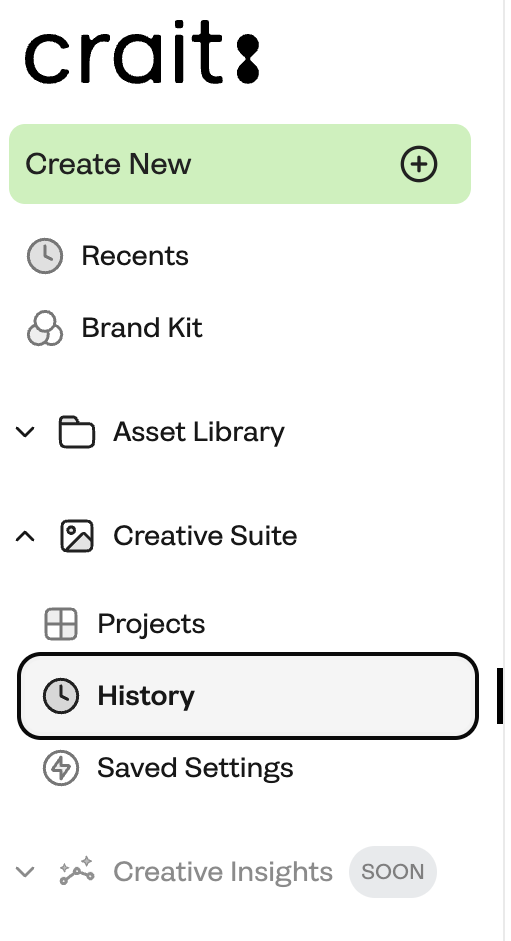
1. On the dashboard, click the "Creative Suite" button then click the "History" section.
2. Browse through the list of your previous projects. You can search or filter the list if needed.
How do I download images?
To download your images, follow these steps:
1. On the dashboard, click your "Project" and see your "Result Images".
2. Click on the image you want to download then click the "Download" icon.
3. Download the image directly to your computer.
Can I share images ?
To share your images, follow these steps:
1. On the dashboard, click your "Project" and see your "Result Images".
2. Click on the image you want to download then click the "Copy URL" icon.
3. This will copy the image url to share.
Can I save a photoshoot setting to use later?
After completing your photoshoot project, click the "Save Settings" options at "Edit" page, by clicking on the photoshoot you like. This way, you will save the settings to use later.
To use your settings later, follow these steps:
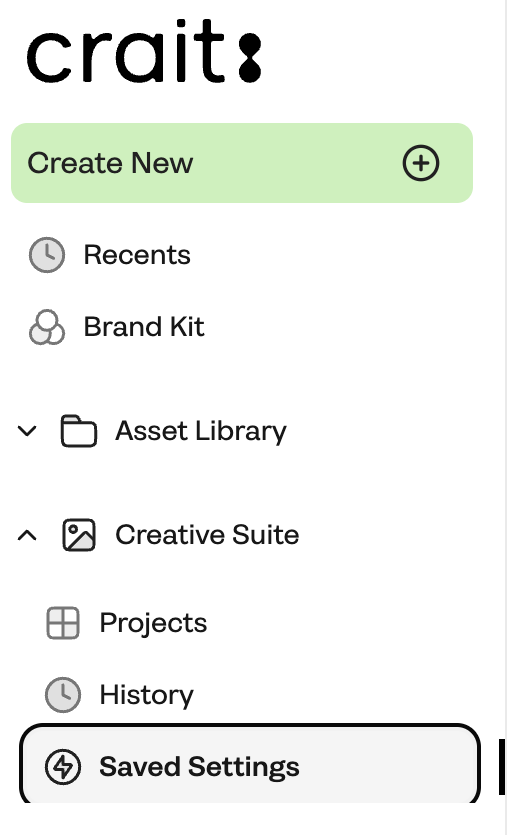
1. On the dashboard, click the "Creative Suite" button then click the "Saved Settings" section.
2. Find the settings you like to use and click on it to use.
How many credits is used for Photoshoot and Edit ?
On the dashboard you will see your left credits and current subscription package at the left menu. Also, by clicking on the "Account Settings" you can see "Image and Product Credits" separately.
You can always upgrade your credits by clicking on the "Plans & Pricing" section.
Visit https://www.crait.it/pricing for details.
To see how many credits are used for each generation, please visit "Credits FAQ".
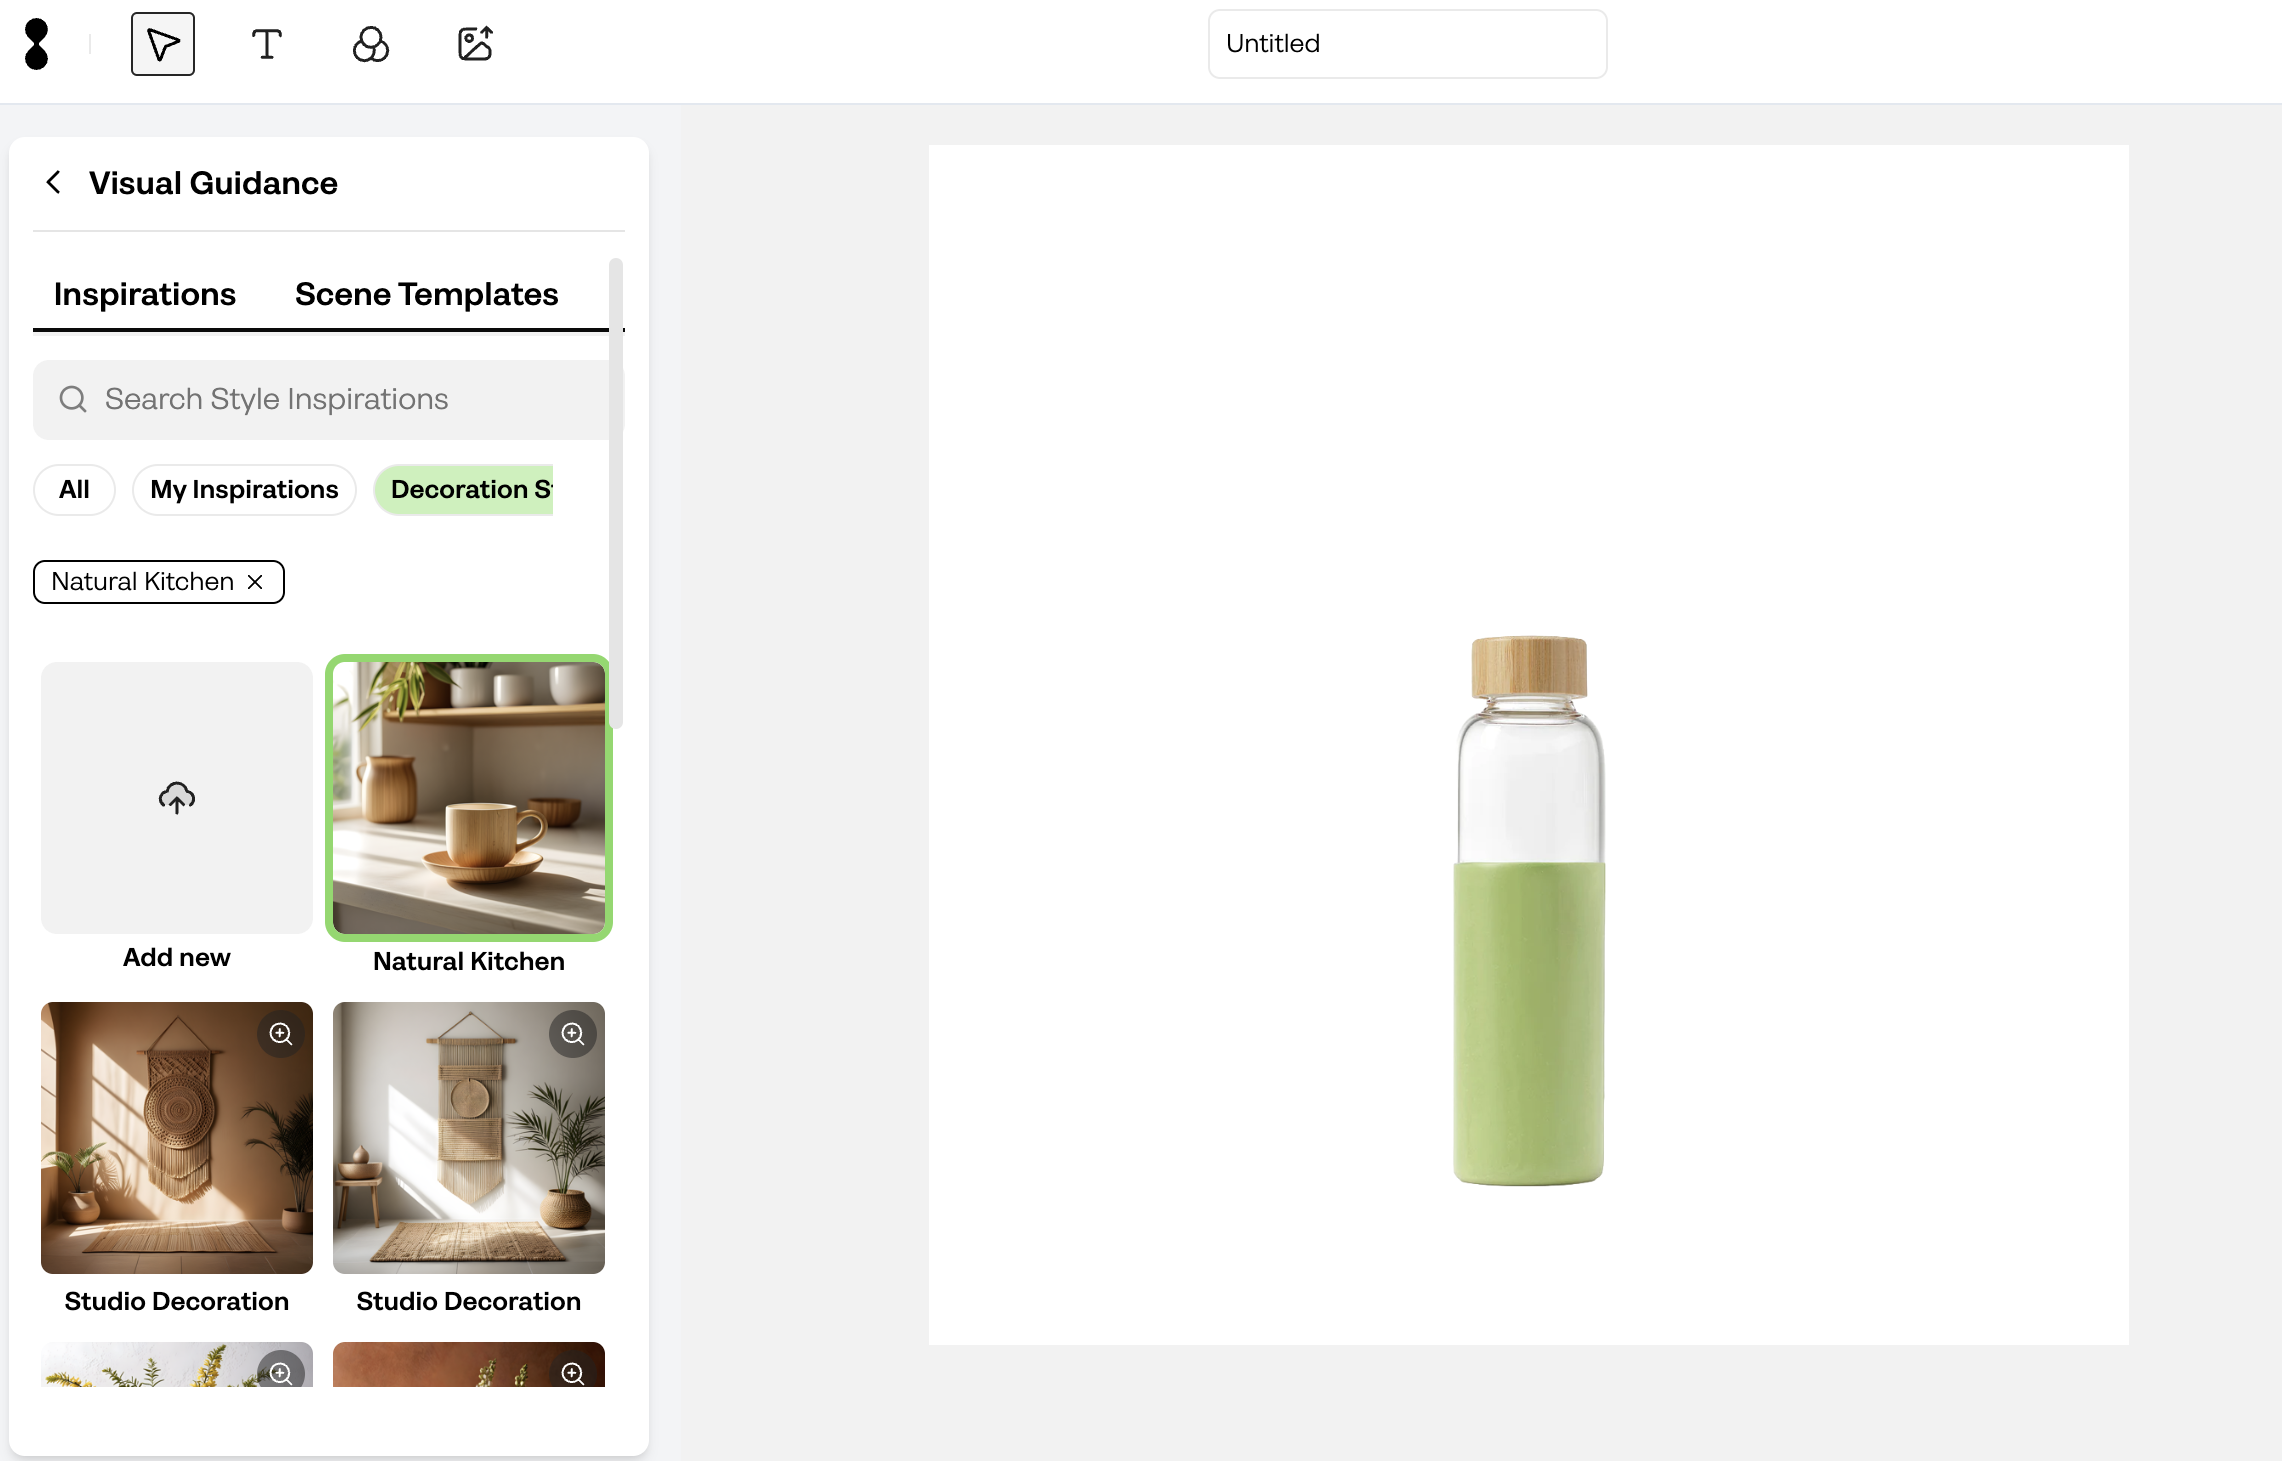
How to use inspiration images?
The "Inspiration" feature in the "Visual Guidance" section on the "Photoshoot" page is designed to help you reach the image you desire. Crait offers a variety of pre-designed inspirations to streamline image creation. It offers visual guidance on styles based on categories. Also, you can upload your inspiration images and use them as a reference for your "Photoshoot" or "AI Images" project from the "Inspiration" option under the "Asset Library" button on the dashboard.*
To use inspiration images, follow these steps:
1. Select the "Inspiration" option from "Visual Guidance" section, when creating a new "Photoshoot" or "AI Image".
2. Choose an inspiration that suits your needs or upload a new inspiration image from "Add new" button.
3. See the your selected and uploaded inspiration is at the top of the list.
4. You can write details about your photo scene in the "Prompt" field and choose one of the "Light" options if you need. (The "Inspiration" feature works with these two features but not with the "Template" feature.)
5. To generate your image click the "Crait Now" buton.
"Inspiration Upload" features are available with "Professional Package" and upper.
Visit https://www.crait.it/pricing for details.
How to use photoshoot templates?
The "Template" feature in the "Visual Guidance" section on the "Photoshoot" page is designed to help you reach the "Photo Background" you desire. Crait offers a variety of pre-designed templates to streamline image creation and provides visual guidance based on categories. Also, you can upload templates and use them as a photo background for your "Photoshoot" project from the "Templates" option under the "Asset Library"
button on the dashboard.*
To use inspiration images, follow these steps:
1. Select the "Templates" option from "Visual Guidance" section, when creating a new "Photoshoot"
2. Choose templates that suits your needs and choose one of the "Light" options if you need. (The "Template" feature does not work with the feature "Prompt" and "Inspiration".
3. After choosing the template, template background will automatically be seen on the"Photo Canvas".
4. Select or upload your product from the "Product Photo" section and position it on the template.
5. To generate your image click the "Crait Now" buton.
6. If you want, save the template by click the "Save"
icon on the to use later. View yo ur saved templates by clicking the "My Templates"section on the list.
* "Template Upload" features are available with "Professional Package" and upper.
Visit https://www.crait.it/pricing for details.
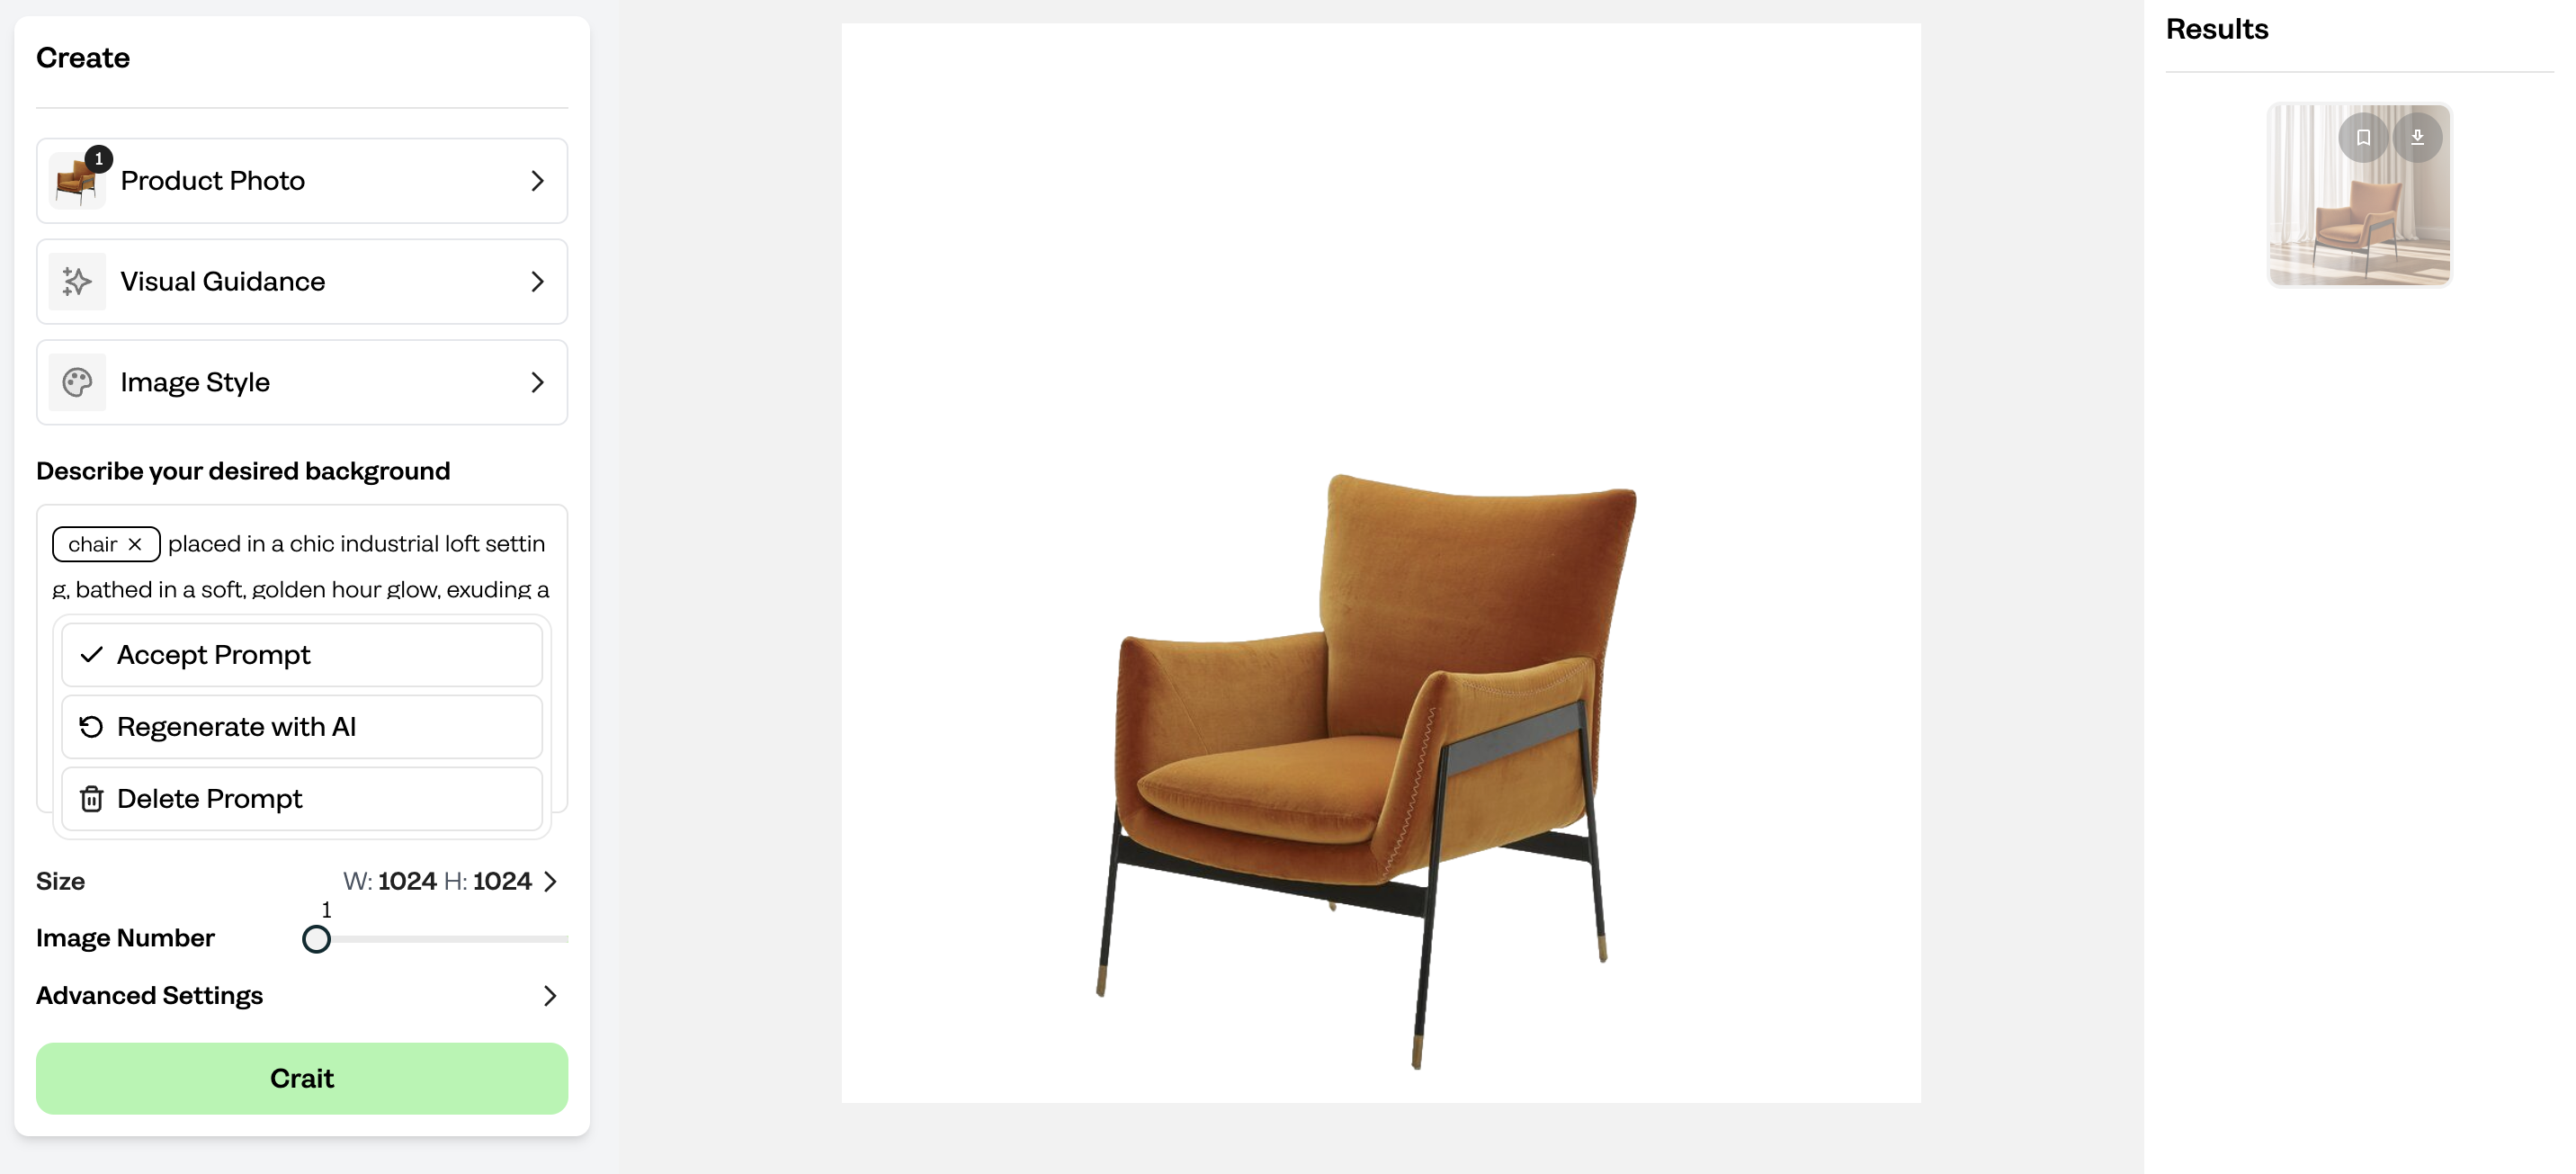
How to use "Complete my Prompt" feature?
To use "Complete My Prompt" feature, follow these steps:
1. Write your "Prompt" or leave it empty.
2. Click the "Complete My Prompt" button below the "Prompt" box
3. See AI suggestion prompt and select one.
4. If you don't like the suggestion click on "Recreate" or "Delete". "Recreate"
until you like the "Prompt" suggestion.
4. If you don't like any of the options click the "Delete".
6. Once satisfied, click on "Accept" to continue with "Prompt".
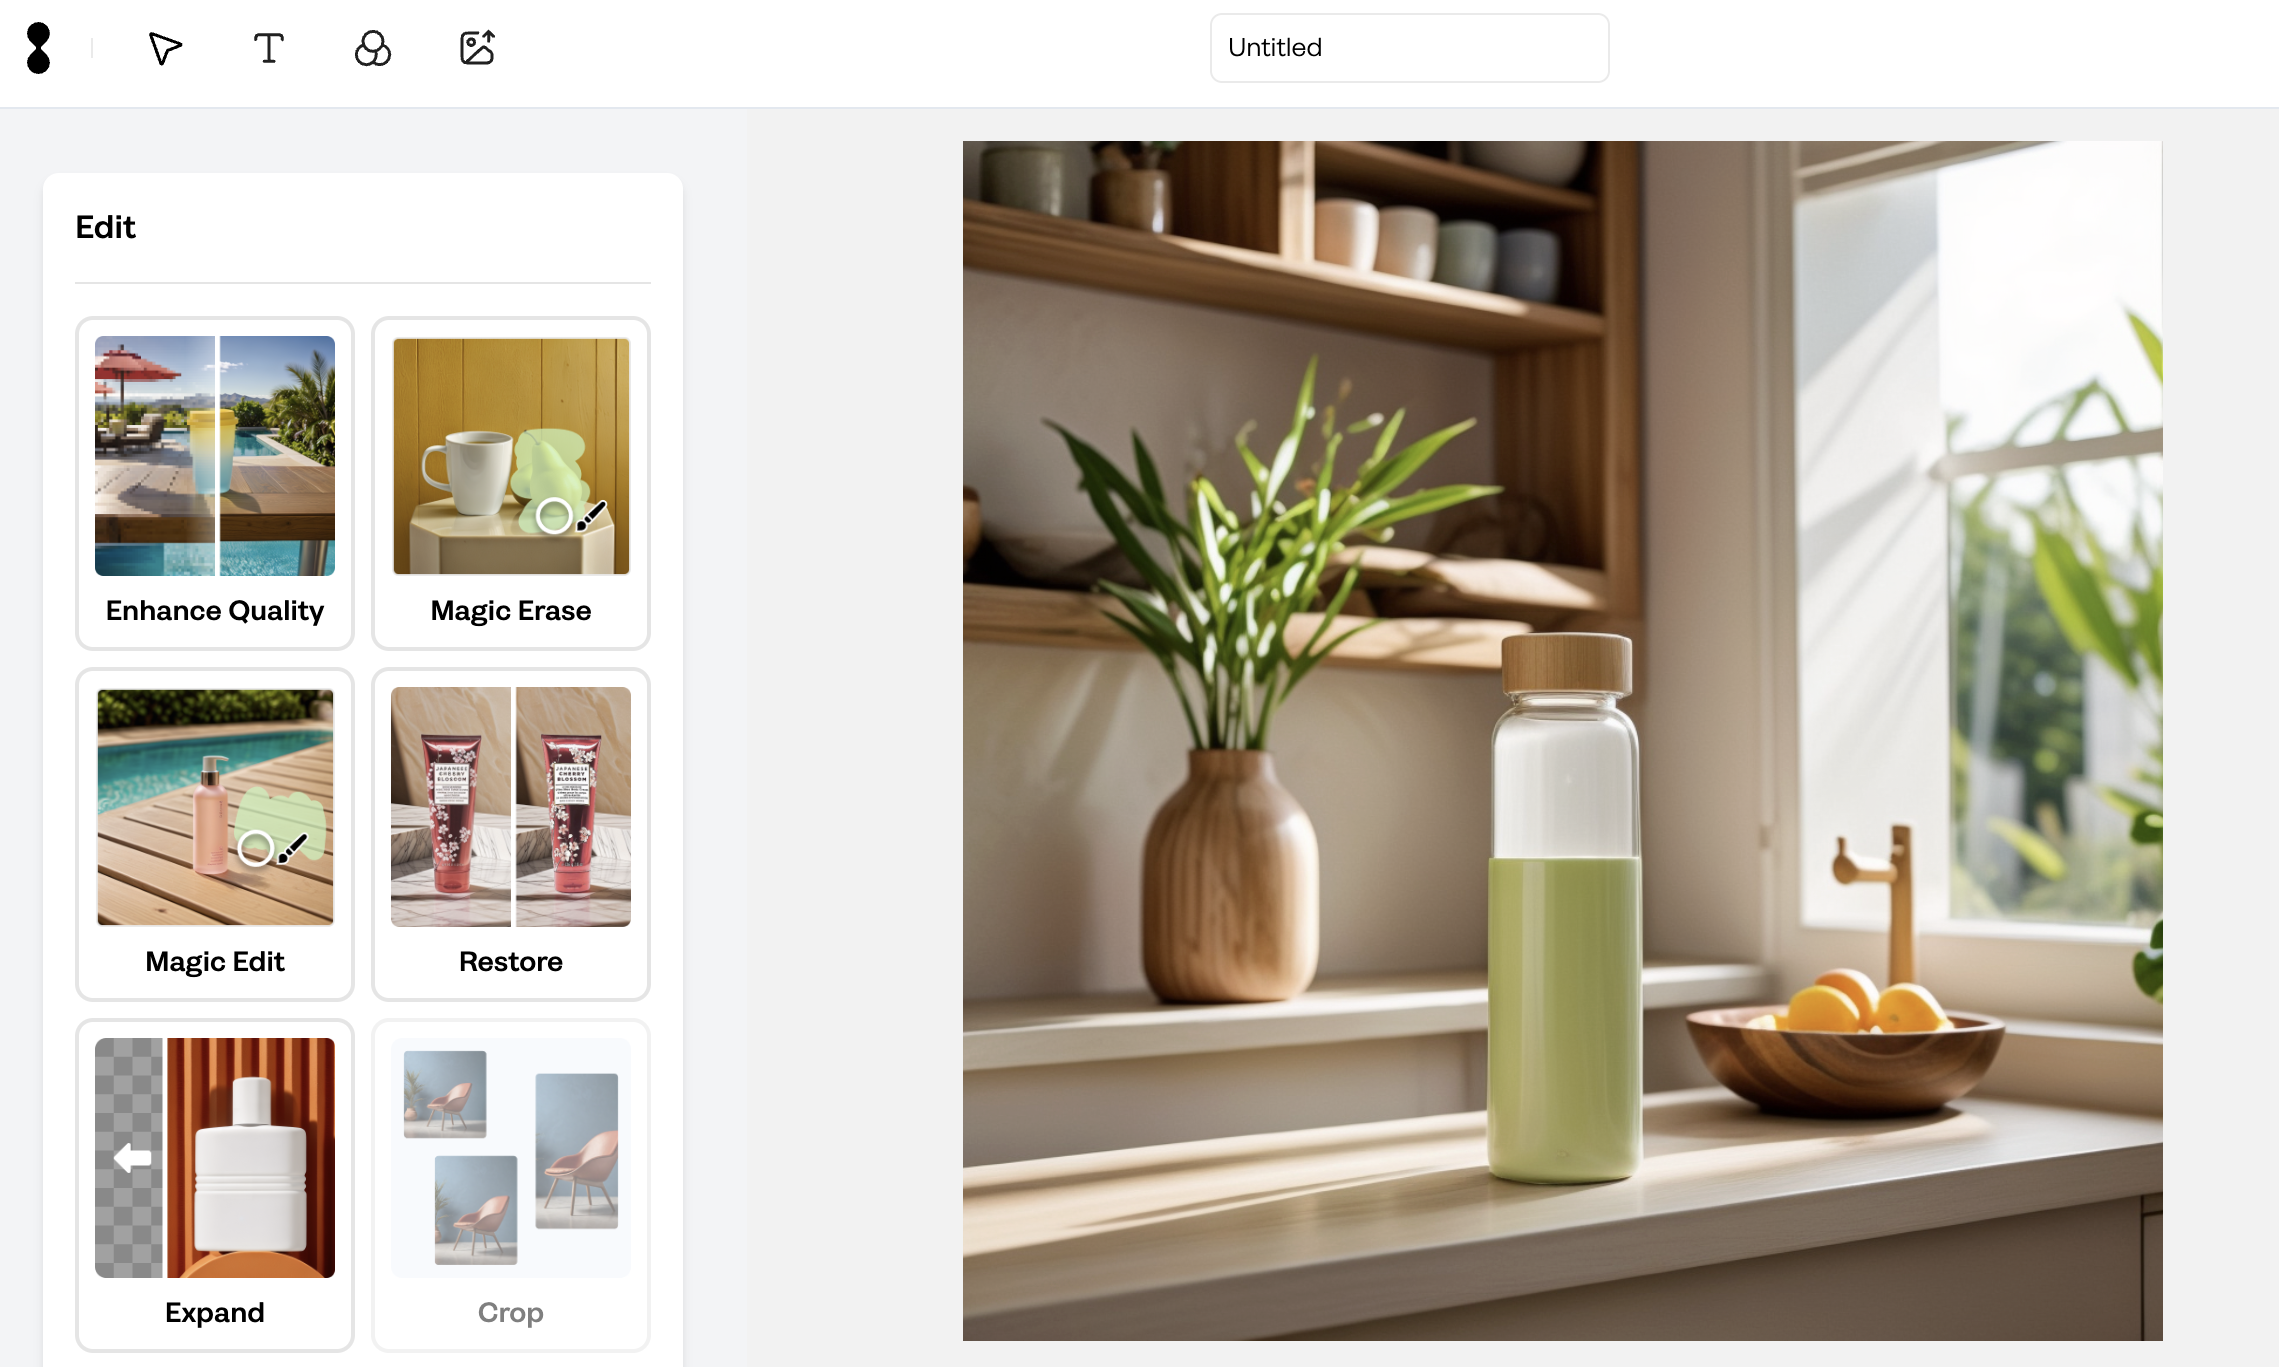
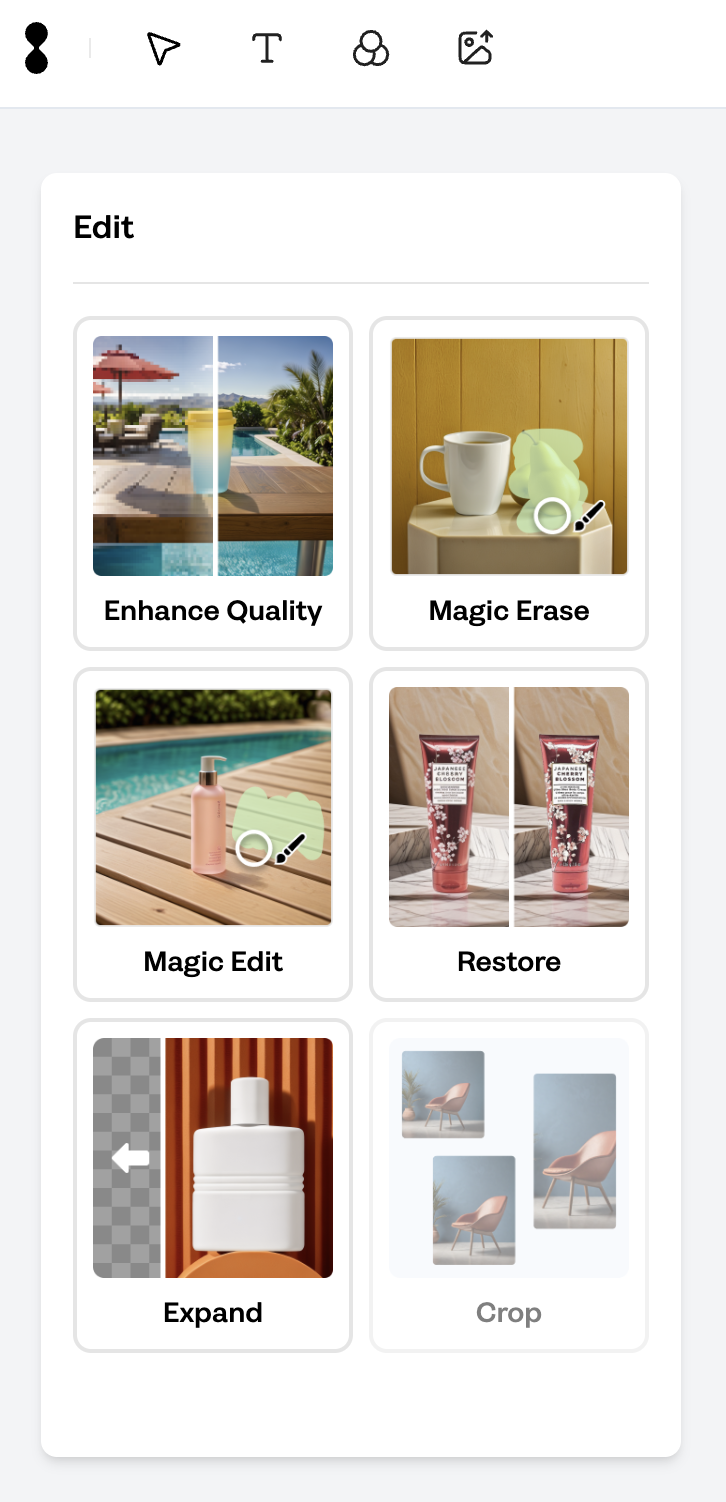
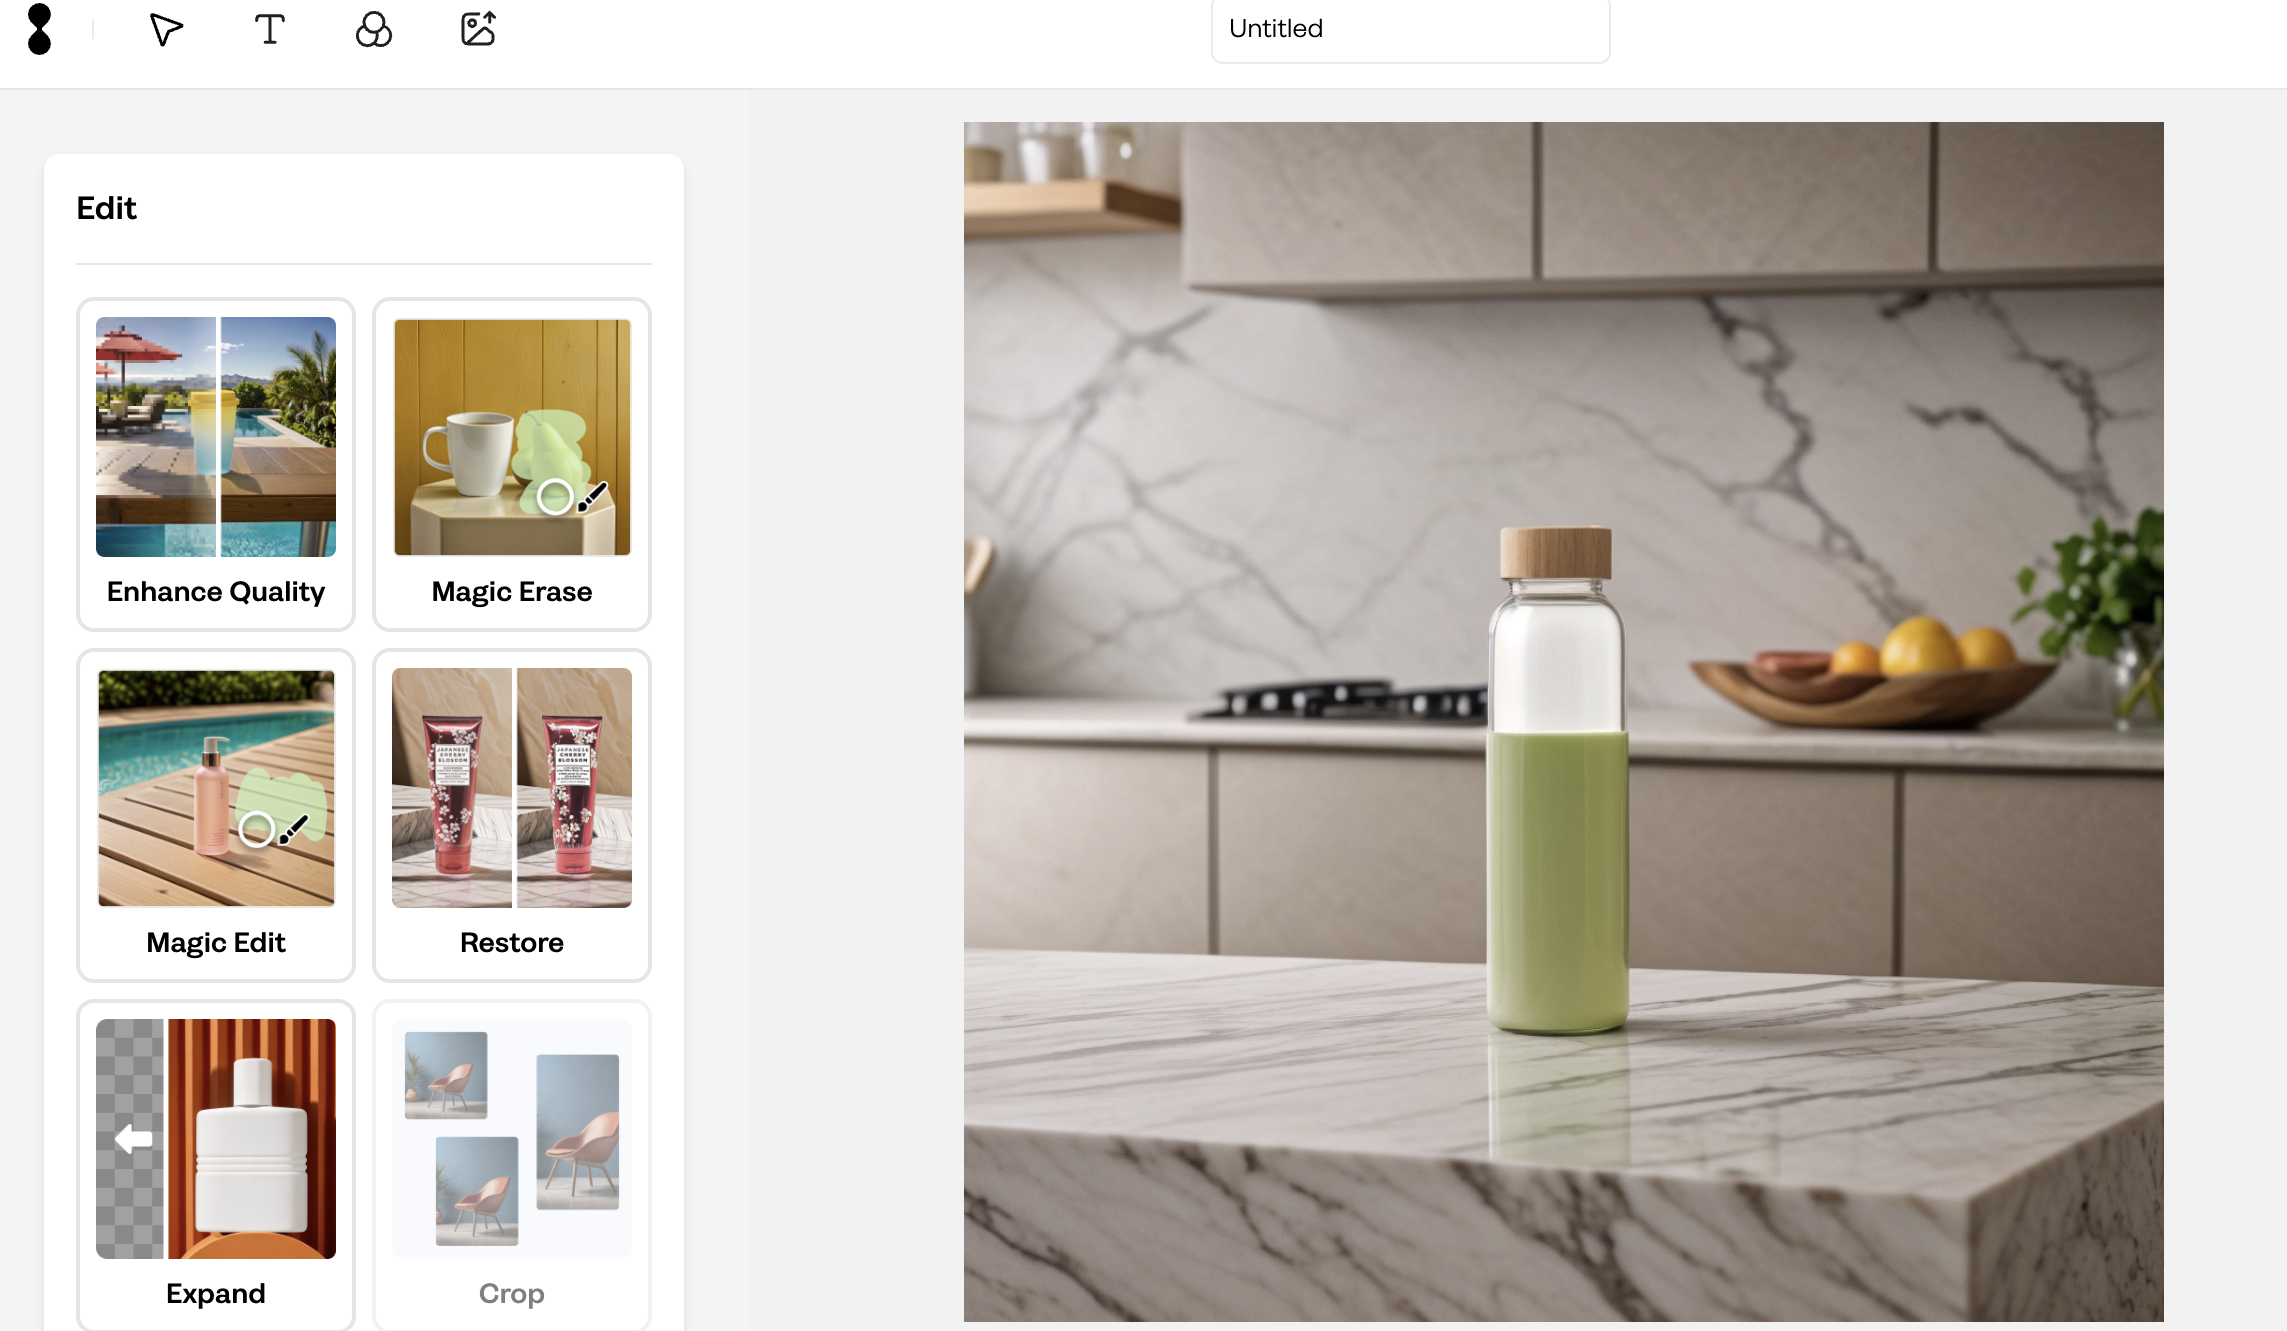
How to review and edit photoshoot outputs?
To review and edit your photoshoot, follow these steps:
1. Once your creation is completed, review your results images on the "Result" page or in your "Projects" section on the Creative Suite tab.
2. See the "AI Edit" tools on the left menu: Enhance Quality, Magic Erase, Magic Edit, Restore, Expand, Crop.
3. Select your need edit tool and "Apply" your image. The AI will process and make the necessary adjustments.
4. Check the edited image. If satisfied, "Save" or "Download" it. If not, you can revert and try again
4. Also, you can apply Filters, add Logo, add Text to your image by clicking the "Edit Icons" at the header.
How to make my product background transparent?
To make your product background transparent, follow these steps:
1. "Upload" your product. Visit "How do I upload my products?" question on the "Getting Started" section the "Help Center".
2. When your products are uploaded, their backgrounds will be automatically removed.
3. Also, you can freely "Edit" by using "Restore" and "Clean" features.

Can I generate new templates to use at Photoshoot?
Yes, you can add the images from your "Photoshoot" results as a template.*
This feature automatically removes the object from the scene and allows you to save the image as a template.
1. Click the "Result" image at the "Photoshoot Project"
2. Click the "Save As Template" from the "Settings".
3. Use the template by clicking on "My templates" at a new "Photoshoot Project."
*This feature is available only for "Custom / Enterprise Package".
Visit https://www.crait.it/pricing for details.
How do I write a great image prompt for photoshoots?
To write a great image prompt, follow these steps:
1. Start your "Prompt" with describing where your product is: "On a counter at a kitchen." (Do not add your product type, the system will automatically add it to the prompt box.)
2. Be specific and add details: "On a marble kitchen counter at a kitchen."
3. Use Adjectives: "On a marble kitchen counter at a modern and minimalist kitchen."
4. Specify Photoshoot Style: Mention if needed. Example: "On a marble kitchen counter at a modern and minimalist kitchen, editorial style."
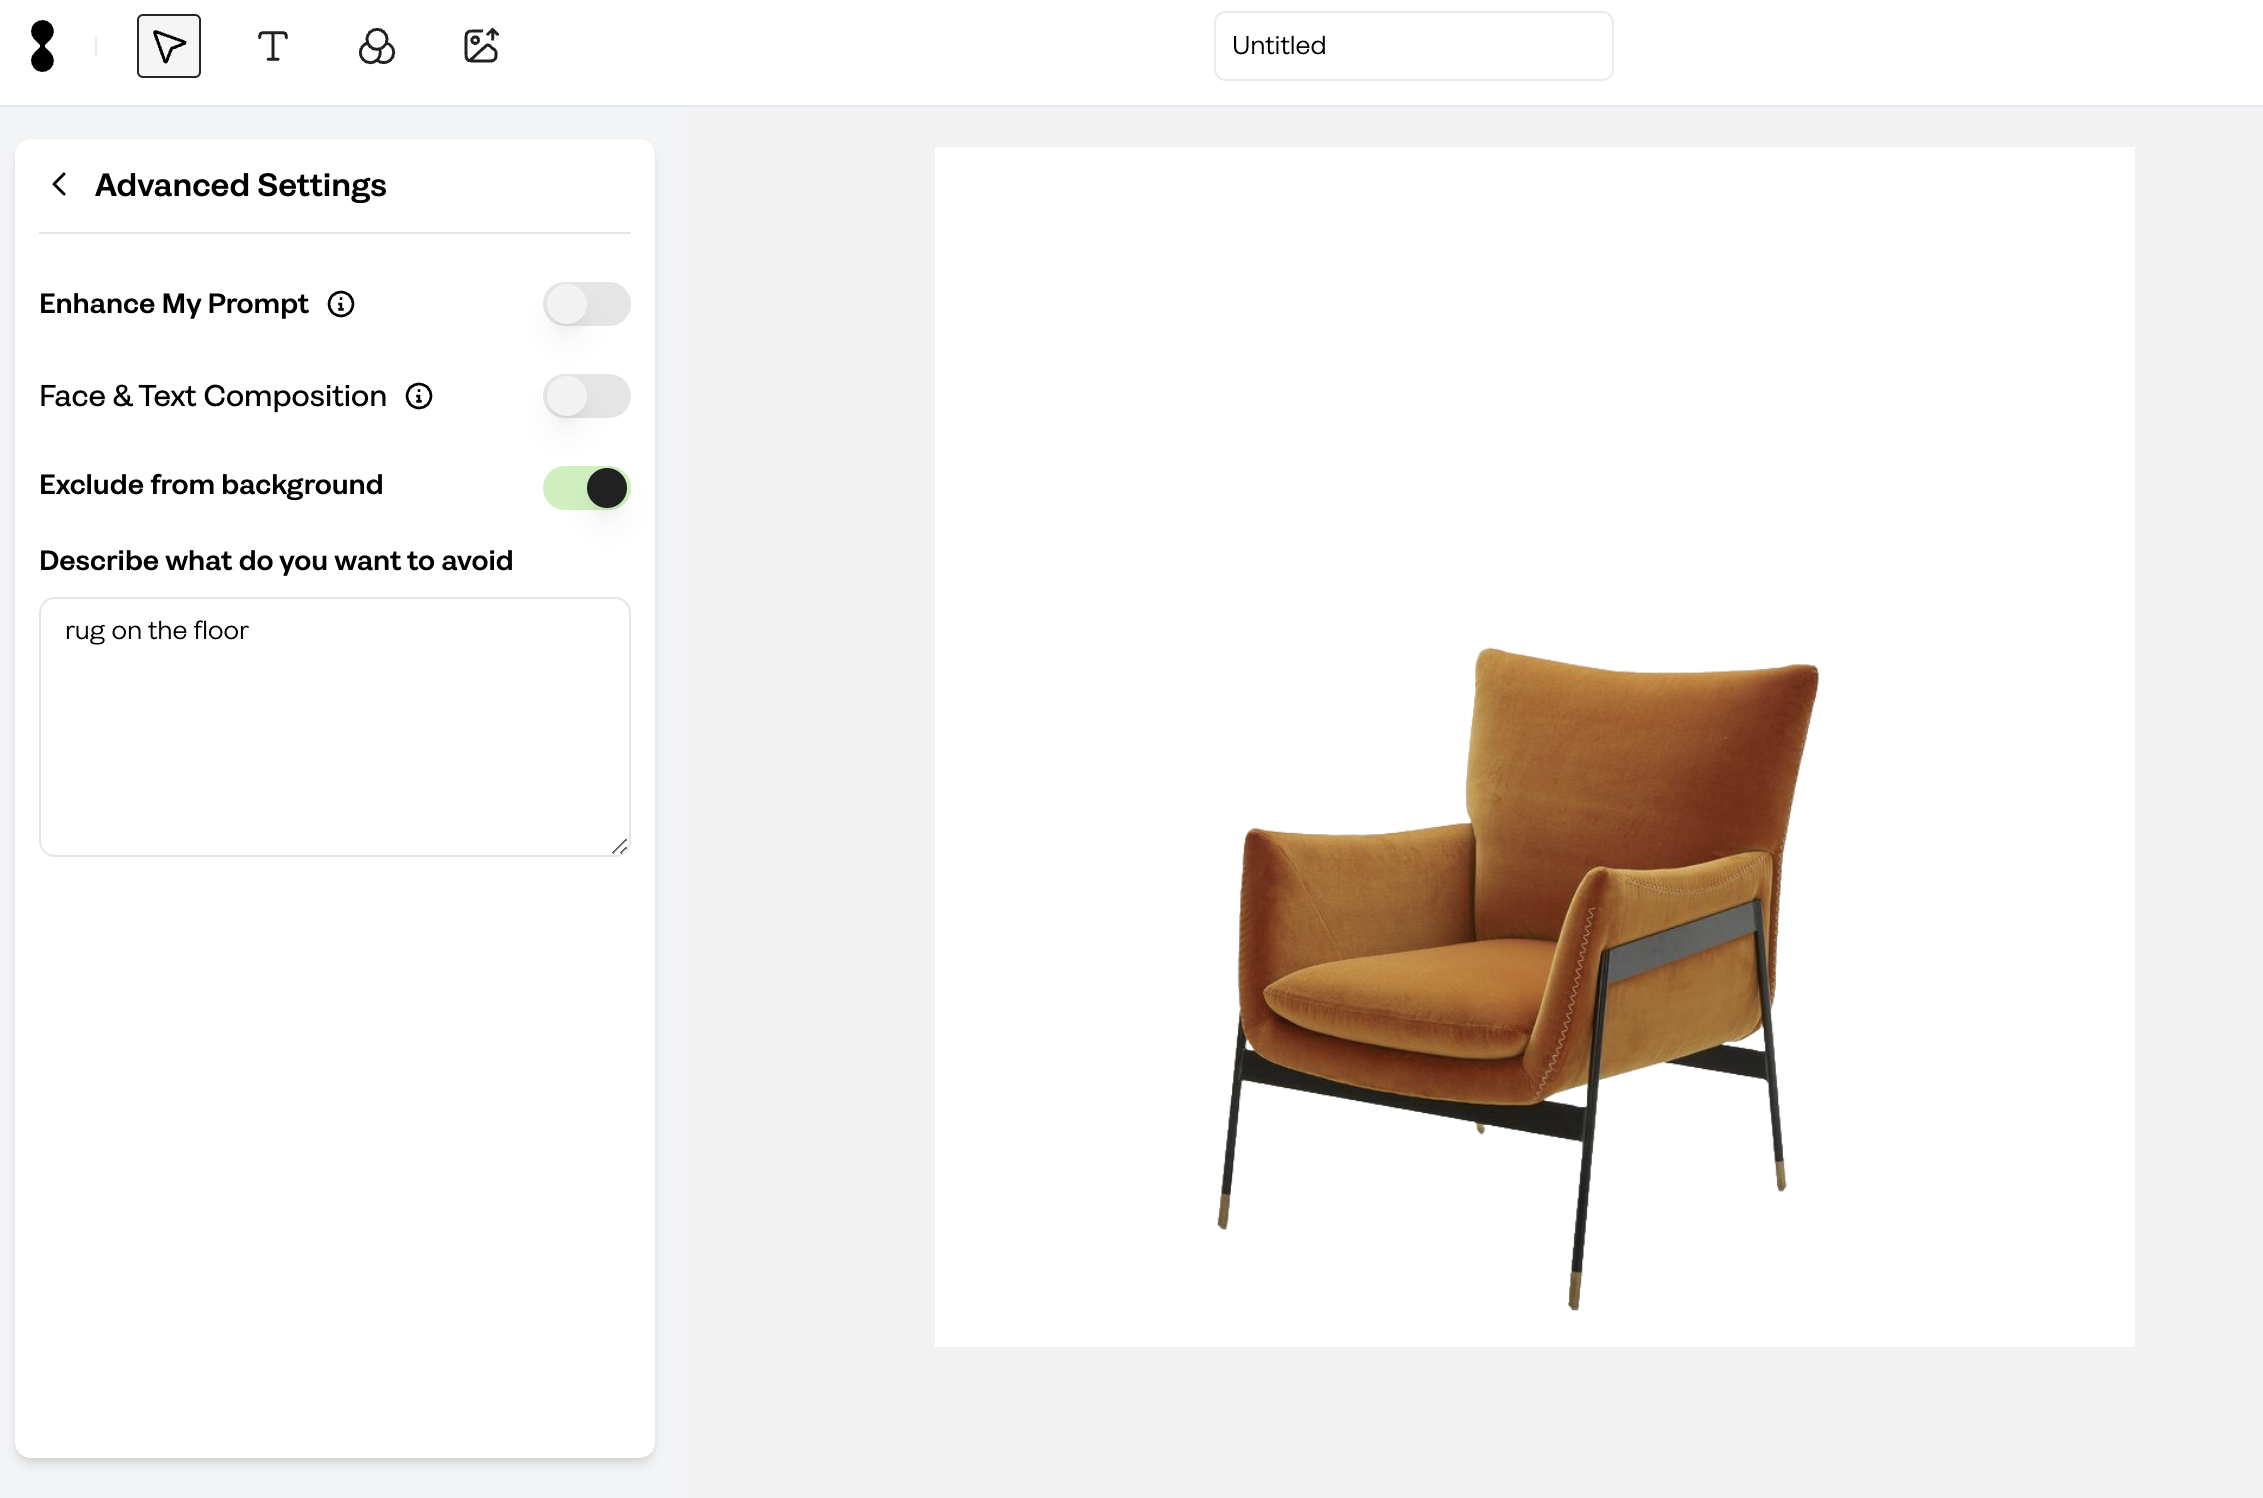
How to exclude something from my photoshoot?
To exclude something from your photoshoot, follow these steps:
1. On the dashboard, click the "Create New" to new "Photoshoot" project
2. Click the "Advanced Settings" and activate "Exclude from background"
option.
3. Describe what do you want to avoid from your background.
4. Click the "Crait Now" buton.
5. If you don't get the result you want, you can also try with "Magic Erase"
tool. For this, go to "How do I use Magic Erase tool?" question on the "Help Center"
How many credits are used for each generation?
Crait has a simple pricing policy where each image generation requires 1 AI image credit.
Following image editing tools require no credits:
- Crop Image
- Product/Partial Restore
- BG Remove
Can I upload multiple products to the same photoshoot at once?
Yes, Crait supports multi-product photoshoots. You can combine multiple products in a single photoshoot and set them in your desired scene. Here's how:
1. Select Your Products:
Choose the products you want to include by clicking on them.
2. Arrange on Canvas:
Place the selected products on the canvas, ensuring their size and positioning are appropriate.
3. Finalize and Click 'Crait':
Once you're satisfied with the arrangement, click 'Crait' to generate your photoshoot."
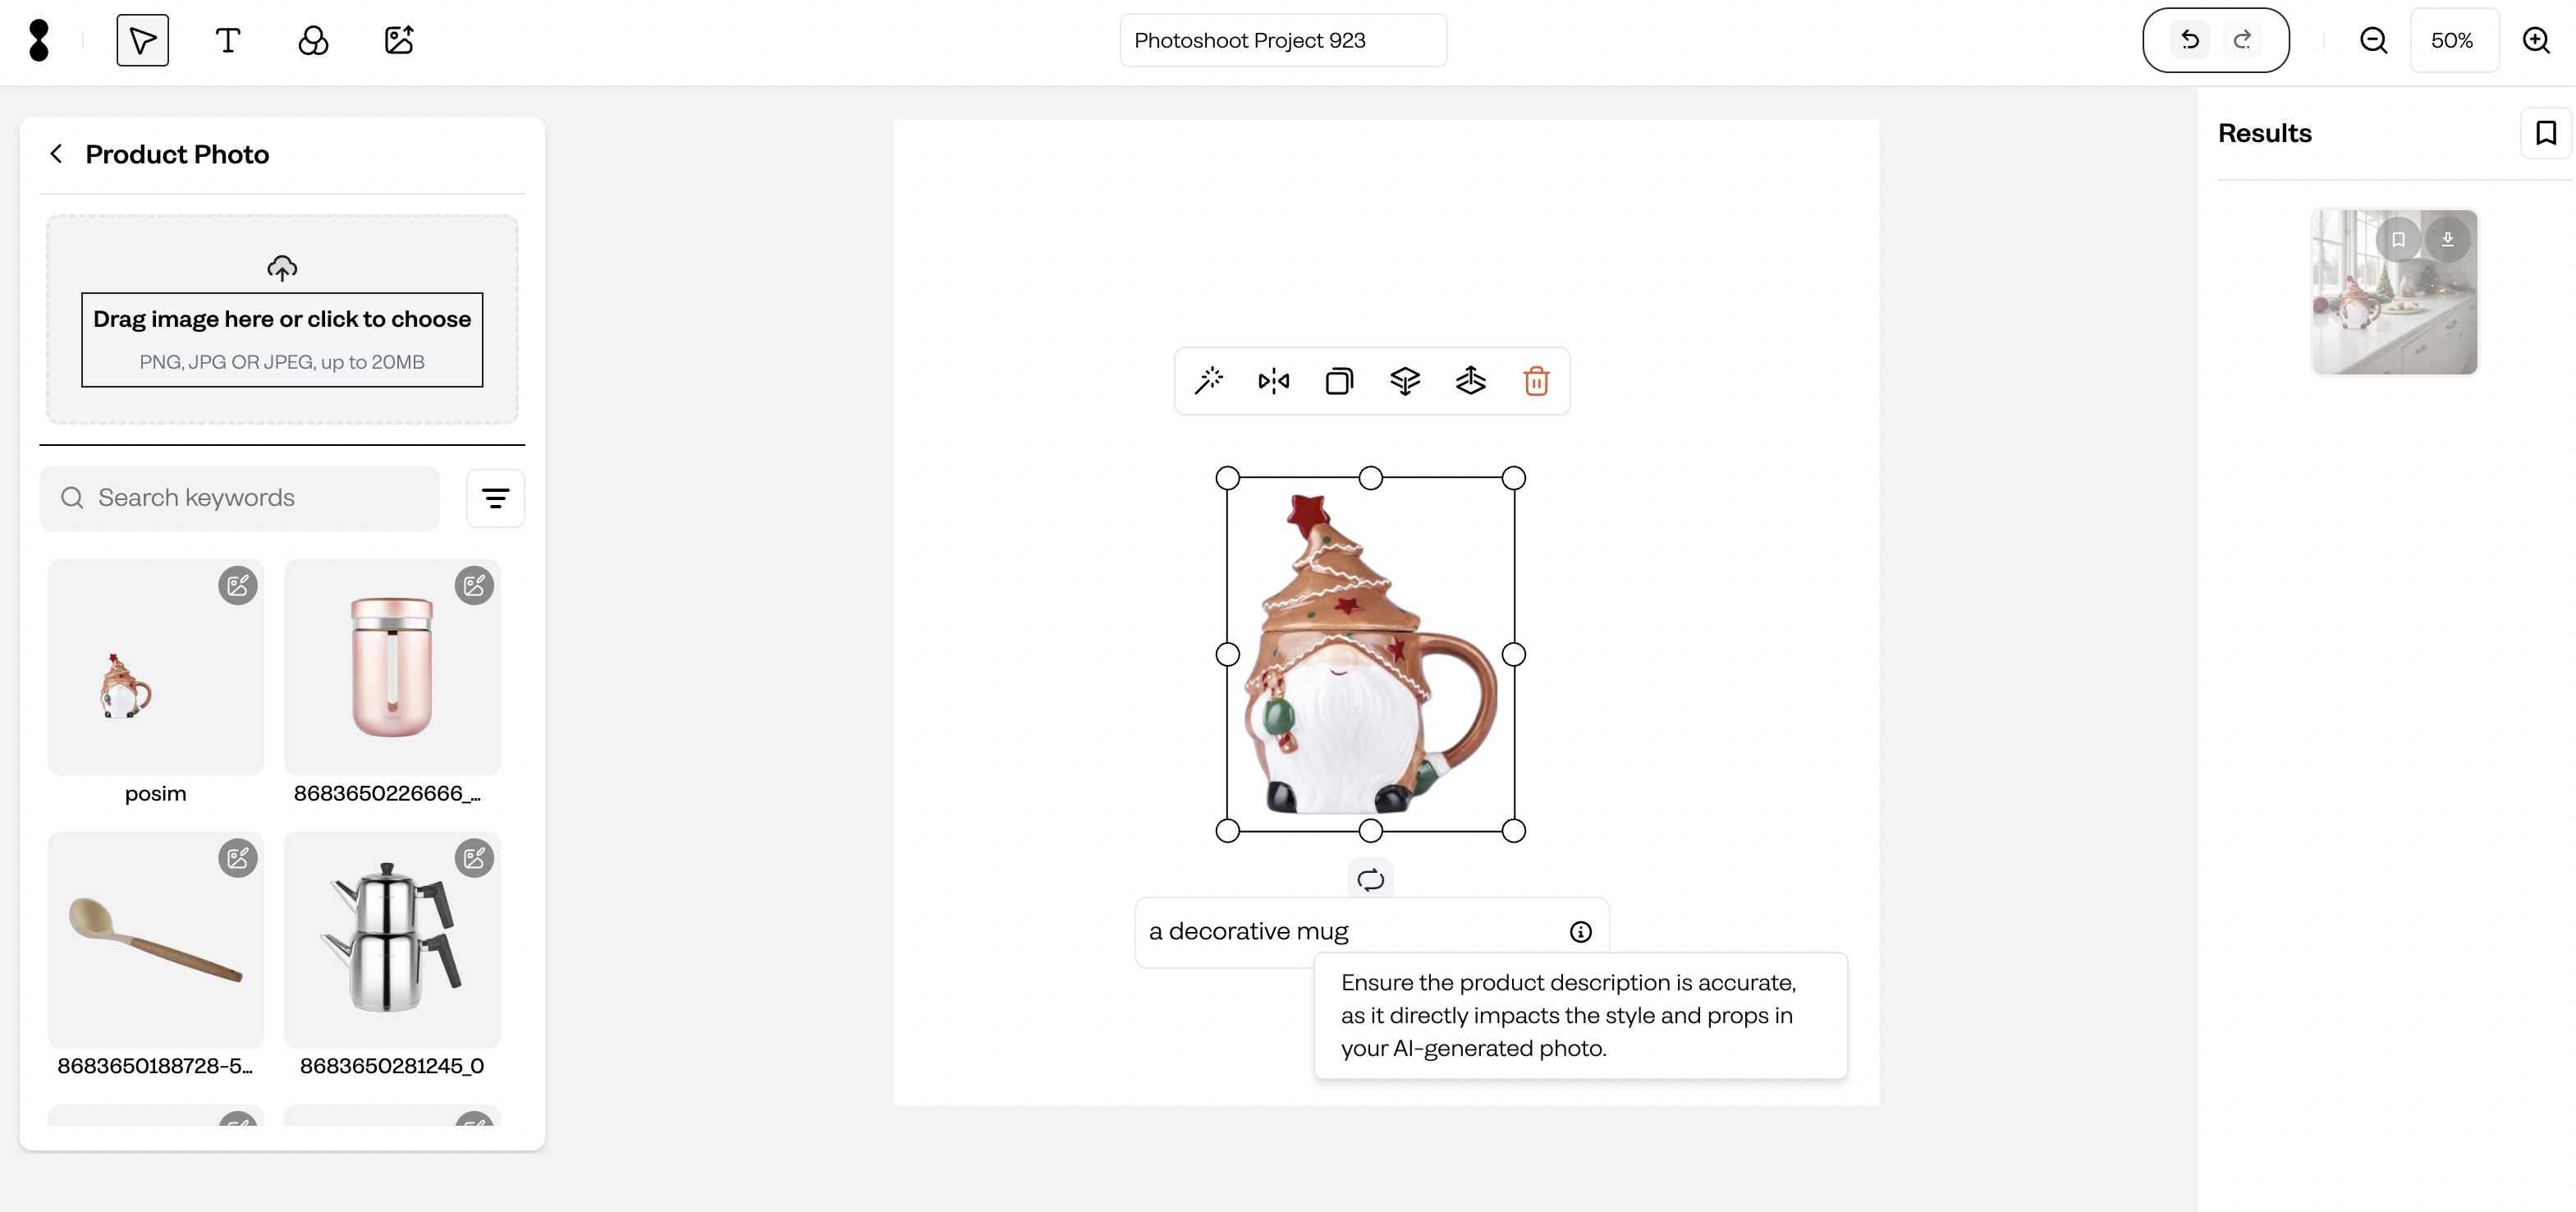
How photoshoot tool recognizes my product? Can I change it?
- When you upload a product, Crait AI analyzes it and generates a caption that describes key characteristics. The caption is displayed on the canvas below to the product .
- If the caption doesn't fully capture your product or needs tweaking, simply click on the caption displayed on the canvas. You can edit it directly to ensure accuracy, giving you full control over the final output.
- Accurate captions allow Crait AI to create more precise and realistic scenes for your product by understanding the product better. This ensures that the background, lighting, and overall visual feel are optimized for your product's marketing goals.
Can I write my prompts in my own language?
Yes, you can write your prompts in the following languages, and Crait will automatically translate them for you:
- Turkish
- English
- Spanish
- French
- German