How do I write a great image prompt for AI Image?
To write a great image prompt, follow these steps:
1. Be Specific: Describe the main subject in detail. "Photo of a bronze sculpture of a ballerina,"
2. Add Details: Include colours and background. "Photo of a bronze sculpture of a ballerina, on a marble pedestal"
3. Use Adjectives: Convey mood and style. "Photo of an elegant bronze sculpture of a ballerina in a graceful mid-pose, on a marble pedestal"
3. Specify Art Style: Mention if needed. "Photo of an elegant bronze sculpture of a ballerina in a graceful mid-pose, on a marble pedestal, in the style of classical realism."
4. Provide Context: Ensure clarity. Example: "Photo of a elegant bronze sculpture of a ballerina in a graceful mid-pose, on a marble pedestal, displayed in a sunlit gallery."
How do I edit an image?
To edit an AI image, follow these steps:
1. Once your creation is completed, review your results images on the "Result" page or in your "Projects" section on the Creative Suite tab.
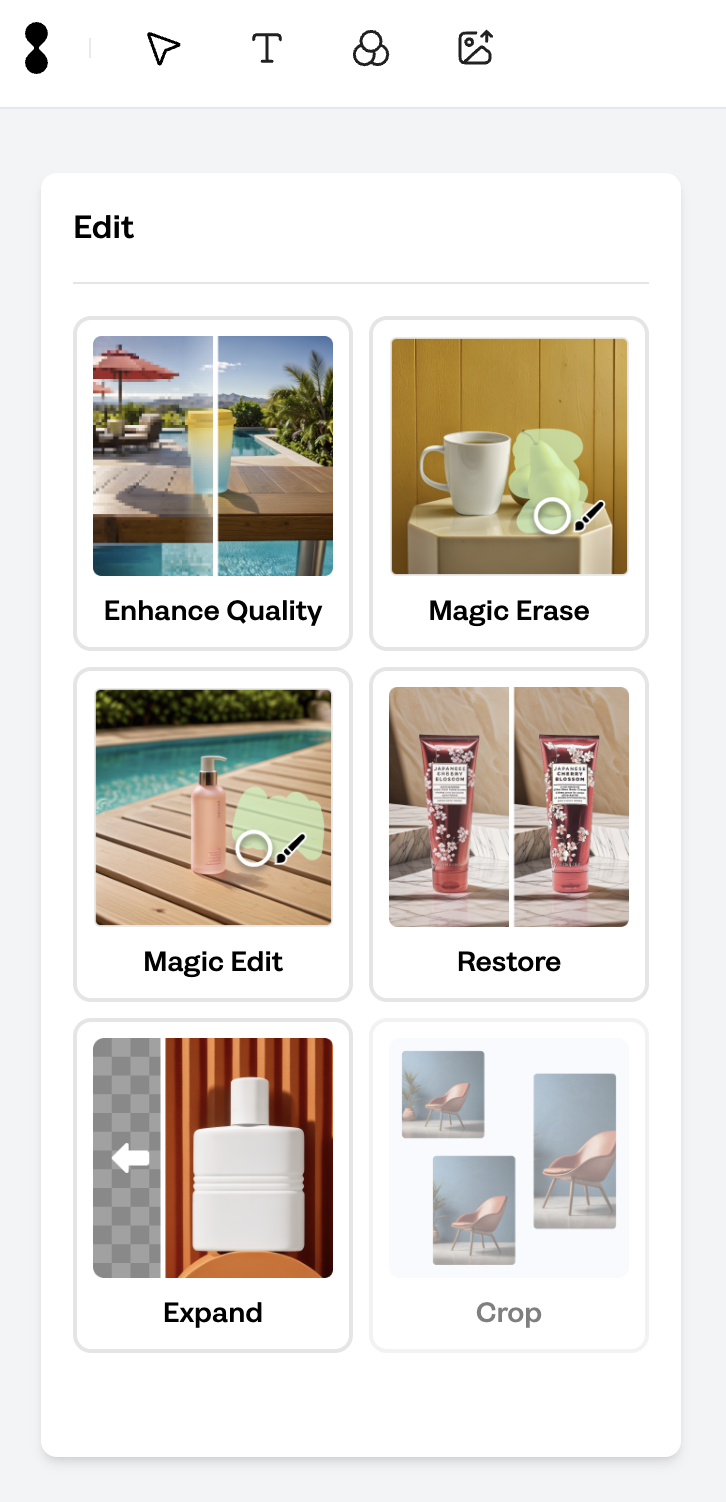
2. See the "AI Edit" tools on the left menu: Enhance Quality, Magic Erase, Magic Edit, Restore, Expand, Crop.
3. Select your need edit tool and "Apply" your image. The AI will process and make the necessary adjustments.
4. Check the edited image. If satisfied, "Save" or "Download" it. If not, you can revert and try again
4. Also, you can apply Filters, add Logo, add Text to your image by clicking the "Edit Icons" at the header.

How do I use AI Image tool?
To use the AI Image tool, follow these steps:
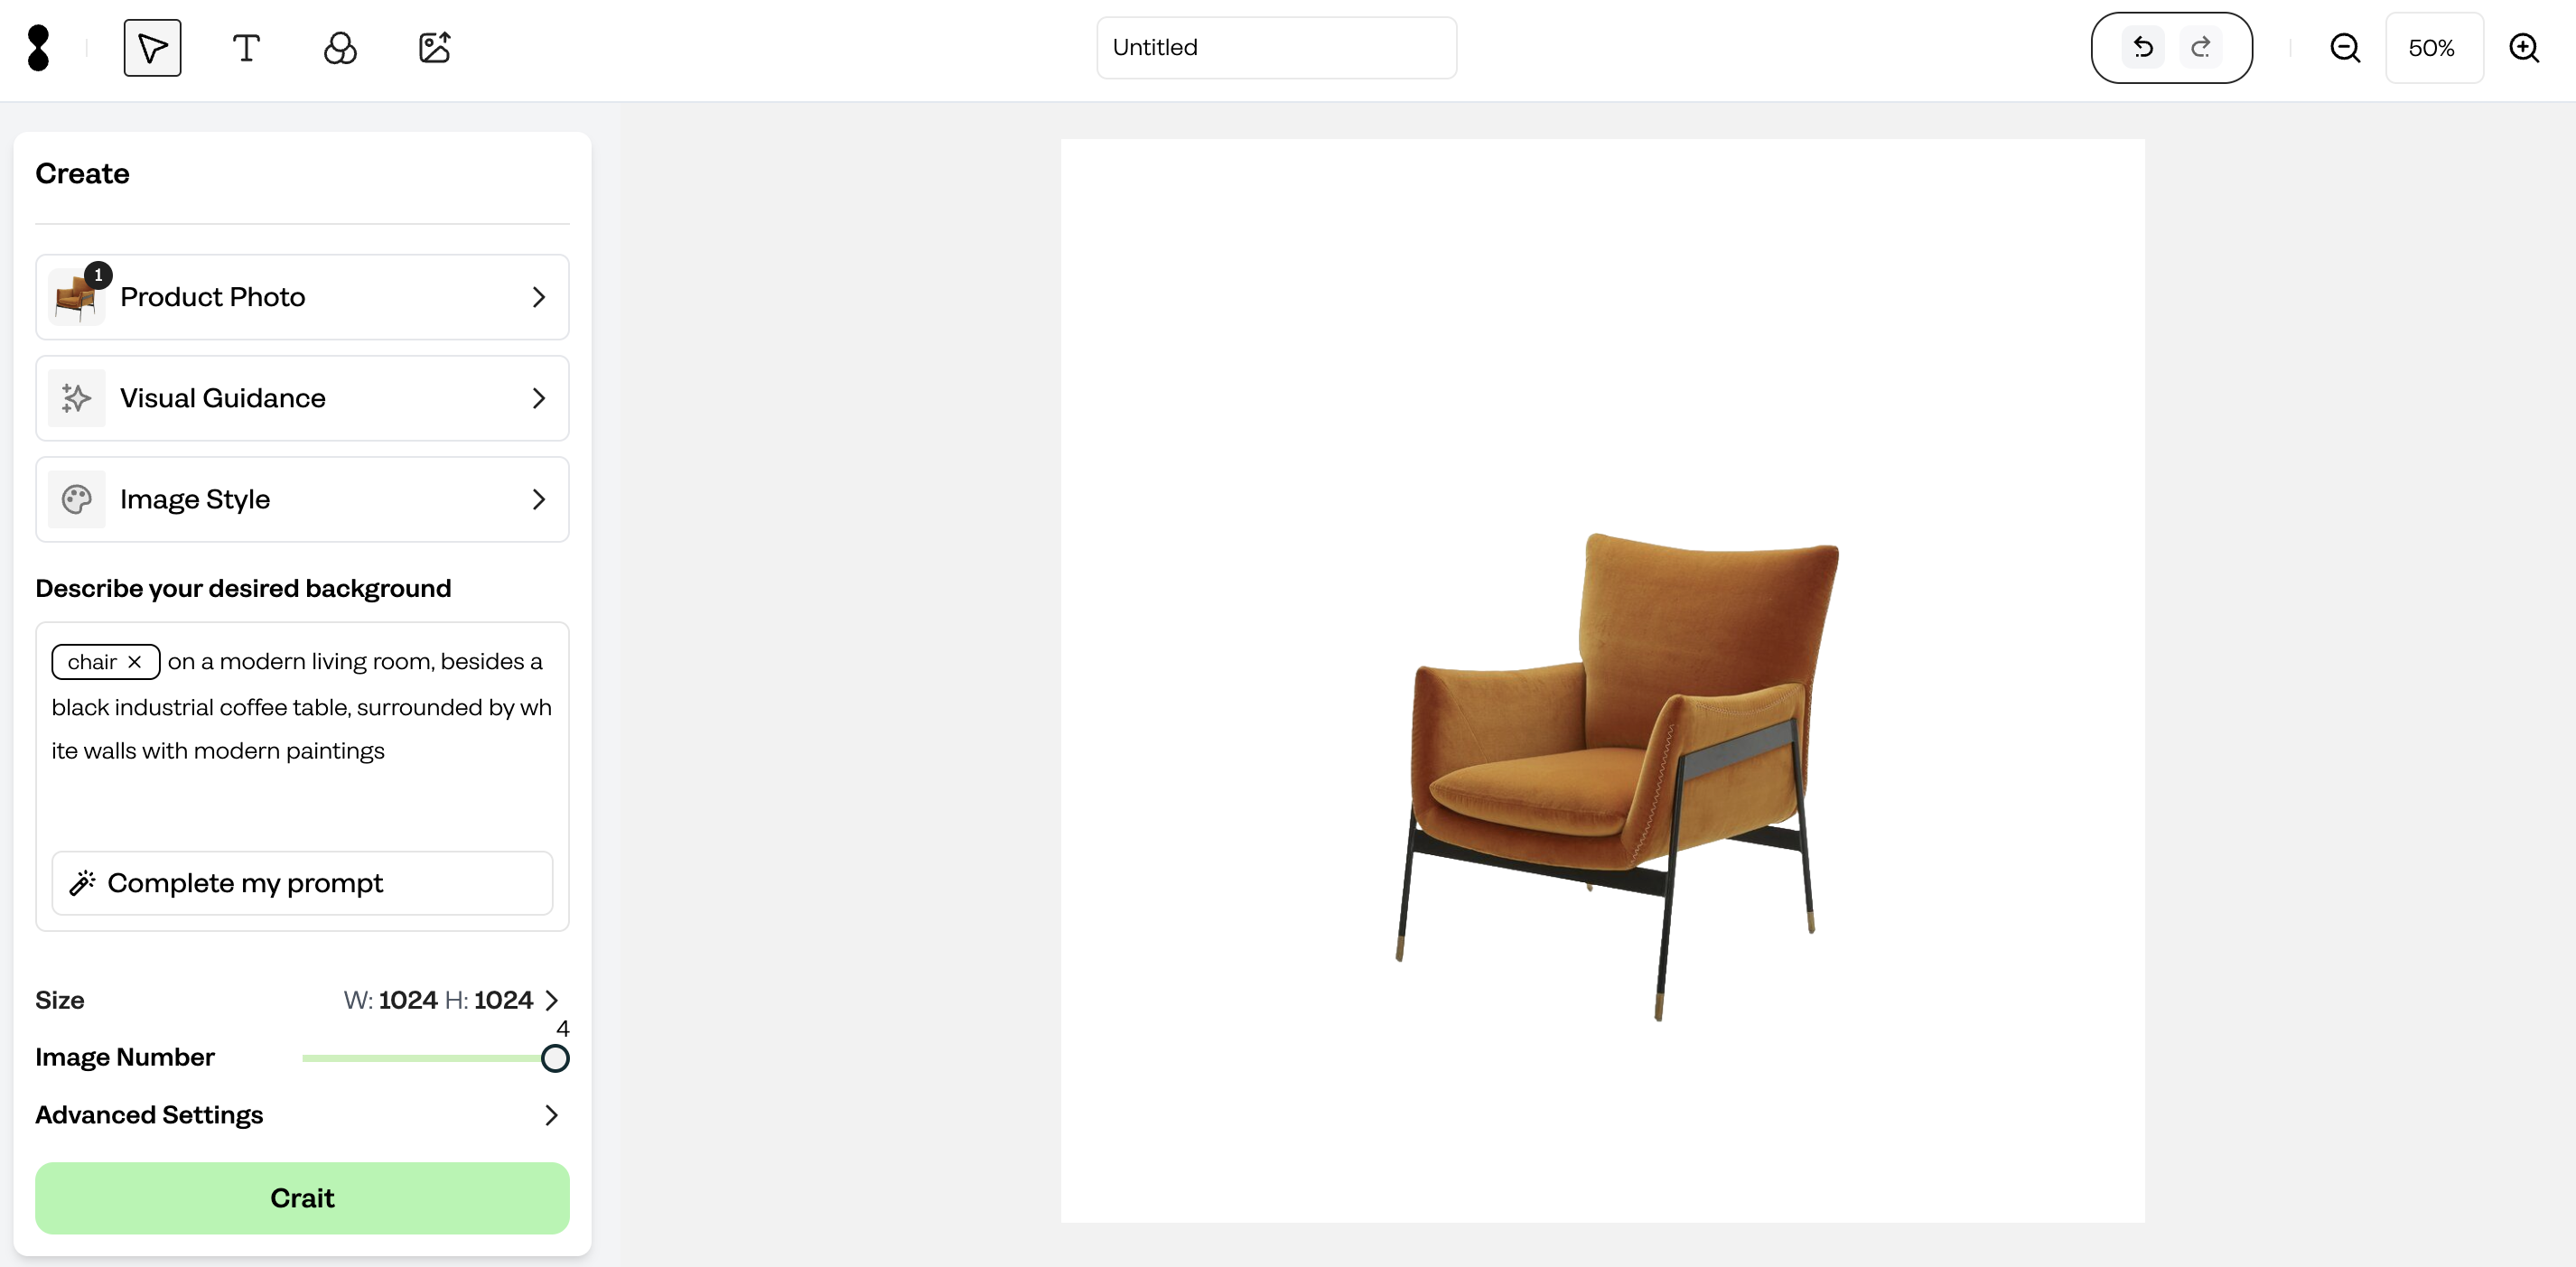
1. On the dashboard, click the "Create Now" button, then
click the "AI Image" section.
2. Write the "Prompts" to set up your photoshoot environment or select the "Inspiration" from "Visual Guidance" section to create.
3. Choose the size or enter a custom size.
5. Choose how many images you like to generate from 1 to 4.
6. Go to the "Advance Settings" section and write what you want to exclude in your "AI Image"
7. To generate your image click the "Crait Now" buton.
8. To use "AI edit" tools if you needs, click the "Edit" buton on the image.
9. Once satisfied with the result, "Save" and "Download" your image to use.
